Last Updated on April 11, 2026 by Susanna Zuyeva
A dirty grill is a bad grill.
It smokes. It smells. It ruins the flavor of your food. And it breaks down faster than a clean one.
I have used electric BBQs for years. I know what happens when you skip cleanings. The grease builds up. The grates get sticky. The food starts tasting wrong. It is not a fun situation.
The good news is this. Cleaning an electric griller is simple. It takes less than ten minutes after most cooks. And once you build the habit, it feels completely effortless.
This guide covers everything. The quick clean you need after every cook. The deep clean you need every few weeks. And the habits that keep your grill in top shape for years.
Let us get started.
Why Cleaning Your Electric BBQ Matters
Most people clean their grill because it looks dirty. But there are bigger reasons to stay on top of it.
Your food tastes better. Old grease burns during cooking. It creates smoke. That smoke sticks to your food and adds a bitter, stale flavor. A clean grill means clean-tasting food every time.
It is safer. Grease buildup in the drip tray is a fire risk. When enough fat collects and the grill gets hot enough, it can ignite. Regular cleaning removes that risk completely.
Your grill lasts longer. Baked-on grease corrodes surfaces over time. It damages non-stick coatings. It clogs heating elements. Cleaning after every use prevents all of this.
It cooks more evenly. Grease on the heating element acts like insulation. It slows down heat transfer. A clean grill heats faster and stays more consistent throughout cooking.
Cleaning a charcoal BBQ or charcoal grill means dealing with ash and heavy scrubbing. Electric BBQs are much easier. No ash. No soot. Just a quick wipe and rinse.
What You Need Before You Start
You do not need anything special. Most of this is already in your kitchen.
For routine cleaning:
- Warm water
- Dish soap
- A grill brush or soft scrubber
- Paper towels or clean cloths
- A sponge
For deep cleaning:
- Baking soda
- White vinegar
- An old toothbrush
- A plastic scraper
- A non-scratch scrub pad
What to avoid:
- Steel wool on non-stick grates it strips the coating
- Harsh chemical cleaners they leave residue on cooking surfaces
- Metal scrapers on coated surfaces
- Submerging the main body of the electric griller in water
That last point is important. Water and electrical components do not mix. Only wash the removable parts. Keep the main unit dry at all times.
Two Types of Cleaning You Need
There are two routines. Both matter.
Routine clean After every single cook. Five to ten minutes. Stops grease from building up in the first place.
Deep clean Every four to six weeks. Twenty to thirty minutes. Tackles buildup that the quick clean misses.
Here is exactly how to do both.
The Routine Clean: After Every Cook
This is the most important habit you can build. Do this every time you finish grilling and your electric BBQ will stay in great condition almost permanently.
Step 1 – Turn Off and Unplug
As soon as you finish cooking, turn off the grill. Unplug it from the wall.
Never clean a grill that is still connected to power. This is a safety rule. Do not skip it.
Step 2 – Wait Until It Is Warm, Not Hot
Let the grill sit for ten to fifteen minutes. You want it warm. Not hot.
Warm grates are much easier to clean than cold ones. The grease has not hardened yet. It comes off with very little effort.
Do not wait too long. A fully cold grill means more scrubbing.
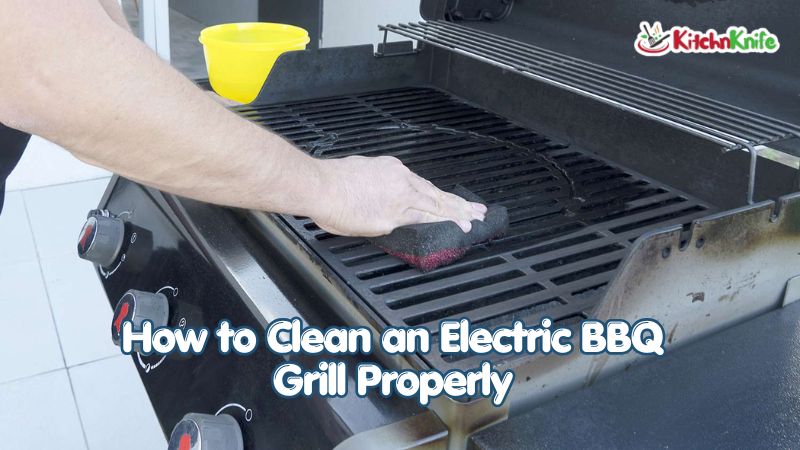
Step 3 – Scrub the Grates
Use your grill brush to scrub the grates while they are still warm.
Work from one end to the other. Brush in the same direction as the grate ridges. Do not scrub randomly. A methodical approach gets everything in under two minutes.
If your electric griller has non-stick grates, use a soft brush. Not a metal grill brush. Metal bristles strip non-stick coatings over time.
Step 4 – Wipe the Grates Clean
Dip a cloth or paper towel in warm soapy water. Wipe the grates down. This picks up anything the brush loosened and leaves the surface clean.
Wipe in the direction of the ridges. Do not push residue into the grooves.
Step 5 – Empty the Drip Tray
The drip tray catches fat and juices from your food. It fills up fast.
Remove it carefully. Empty it into the bin. Wash it with warm soapy water. Dry it completely before putting it back.
Never let the drip tray overflow during cooking. Too much fat in the tray creates smoke and can become a fire hazard. Check it between batches if you are cooking large amounts of food.
Step 6 – Wipe the Outside
Use a damp cloth to wipe the exterior of the grill. Remove any splashes or grease marks. Dry with a clean cloth.
Done. That is the full routine clean. Five to ten minutes. Easy.
The Deep Clean: Every Four to Six Weeks
Regular quick cleaning is great. But grease still builds up in spots the routine clean cannot reach. The deep clean fixes that.
Step 1 – Remove All the Parts
Take out the grates, drip tray, and any other removable components. Check your manual if you are unsure what comes out on your specific model.
Step 2 – Soak Everything in Hot Soapy Water
Fill your sink with hot water and dish soap. Put the grates and drip tray in. Let them soak for fifteen to twenty minutes.
Hot soapy water softens baked-on grease completely. After soaking, most of it wipes off with almost no scrubbing at all.
Step 3 – Tackle Stubborn Grease With Baking Soda
Some spots do not come off with soap alone.
Make a paste from baking soda and a small amount of water. Apply it to the stubborn area. Let it sit for ten minutes. Then scrub with a non-scratch pad.
Baking soda is a gentle abrasive. It cuts through grease without scratching surfaces. It works every time.
Step 4 – Use White Vinegar for Baked-On Residue
For the really tough spots, white vinegar is your best tool.
Spray or wipe vinegar onto the affected area. Let it sit for five minutes. The acid breaks down the grease naturally. Then wipe it away. Follow with a plain water rinse and dry thoroughly.
This works on grates, drip trays, and the interior of the grill. It does not damage any material.
Step 5 – Clean Around the Heating Element
This step makes the biggest difference. Most people skip it.
With the grill unplugged and fully cooled, use a barely damp cloth to wipe around the heating element. Do not wet the element directly. Wipe the surfaces nearby to remove any grease that has baked on.
Immediately follow with a dry cloth. Make sure the area is completely dry before you use the grill again.
Step 6 – Clean the Grease Channels
Use a plastic scraper to loosen thick grease deposits in the drip channels. Wipe with paper towels. Then clean with a soapy damp cloth. Dry completely.
Step 7 – Rinse, Dry, and Reassemble
Rinse every washed part with clean water. Dry every piece completely. Then put it all back together.
Any moisture near the heating element creates problems when the grill powers up. Dry thoroughly every single time.
Your electric BBQ is now fully restored and ready for the next cook.
Cleaning Tips for Different Electric Grill Types
Not all electric BBQs are the same. Here is what to know for each type.
Indoor Smokeless Grills
These have water trays that catch grease and smoke particles. Empty the water tray after every single cook. If left, it becomes very unpleasant quickly.
Wash the water tray with dish soap. Dry it before the next use.
Keep the grate surface clean too. The smokeless system only works properly when fat drips cleanly into the water tray rather than burning on the grate.
Outdoor Electric BBQ Grills
Larger outdoor BBQs handle more food so they collect more grease. Use a grill brush immediately after cooking while the grates are still warm. Do not wait.
Wipe the exterior after every outdoor session. Outdoor conditions mean dust, moisture, and pollen collect on the surface. Cover the grill when not in use to protect it from the weather.
Contact Grills
These cook food from both sides at once. Both plates need cleaning after every use.
Wipe both plates while still warm. If there is stubborn residue, lay a damp paper towel over the plate. Close the grill for two minutes. The trapped steam softens the stuck food. Then wipe clean easily.
Simple Habits That Keep Cleaning Easy
These habits take no extra time during cooking. But they make a huge difference when it comes to cleaning afterward.
- Preheat fully before cooking. A properly hot grill releases food much more easily than a warm one.
- Oil your food, not the grates. This reduces how much residue sticks to the surface.
- Clean while warm. Hardened cold grease takes ten times more effort to remove than warm grease.
- Empty the drip tray before it overflows. A full tray is messy and dangerous.
- Cover outdoor grills between uses. Keeps dust and moisture out.
- Season non-stick grates occasionally. After cleaning, apply a thin layer of cooking oil. This maintains the non-stick surface over time.
- Never use metal tools on non-stick coatings. Not during cooking. Not during cleaning.
Build these habits and your cleaning sessions become short, simple, and almost effortless.
Electric BBQ vs Charcoal BBQ: Which Is Easier to Clean?
This is not a close comparison. Electric BBQs win easily.
Cleaning a charcoal BBQ involves:
- Waiting for ash to cool completely before you can touch anything
- Scooping and disposing of ash without making a mess
- Scrubbing grates heavily soiled by direct flame contact
- Cleaning thick black deposits from the inside of the grill bowl
- Managing charcoal storage between sessions
Cleaning an electric griller involves:
- No ash at all
- No soot or fuel residue
- Removable non-stick grates that rinse quickly
- A drip tray that empties in thirty seconds
- A simple wipe of the interior and exterior
The electric BBQ cleaning process is faster, cleaner, and far less physically demanding than maintaining any charcoal grill. This is one of the biggest practical reasons home cooks switch to electric BBQs and never go back.
Frequently Asked Questions
How often should I clean my electric BBQ grill? Do a quick routine clean after every single cook. It takes five to ten minutes. Do a full deep clean every four to six weeks. If you grill multiple times per week, clean more frequently. Consistent cleaning prevents buildup, protects surfaces, and keeps your electric griller performing at its best for years.
Can I put electric grill grates in the dishwasher? Many grates are dishwasher safe. But always check the manufacturer’s instructions first. Some non-stick coatings degrade with repeated dishwasher cycles. When in doubt, hand wash with warm soapy water. The drip tray is usually dishwasher safe too. Always verify for your specific model before putting anything in the machine.