Last Updated on November 10, 2025 by Susanna Zuyeva
Our Top Picks
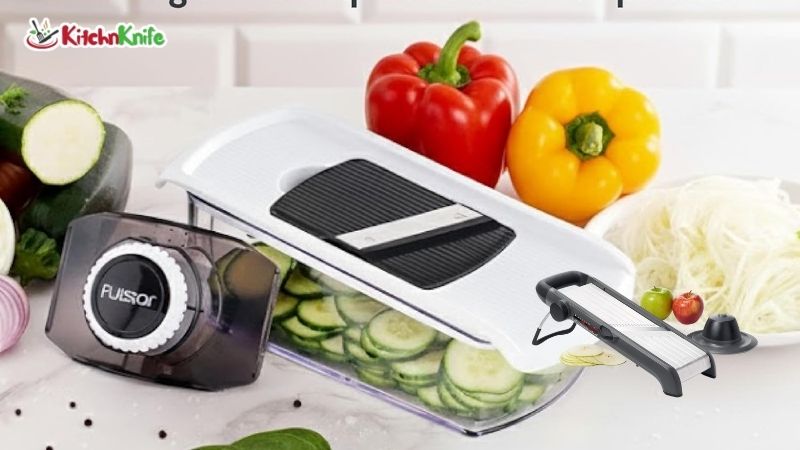
After testing all three models, here’s what I found:
Best Overall: Fullstar Mandoline Slicer – This gave me the most value. Six blades, large catch tray, and it stayed sharp through heavy use.
Best for Simple Tasks: OXO Handheld Mandoline – Perfect if you just need basic slicing. Small, easy to store, and works great for cucumbers and zucchini.
Best for Serious Cooks: OXO Chef’s Mandoline 2.0 – This costs more but offers pro-level features. The thickness dial and waffle cuts impressed me most.
Why You Need a Mandoline Slicer
I used to slice vegetables with a knife. It took forever. My slices came out uneven. Potatoes cooked at different rates. Salads looked messy.
A mandoline slicer changed everything.
Now I can slice a whole cucumber in 30 seconds. All slices come out the same thickness. My gratins cook evenly. My salads look restaurant-quality.
Here’s what a good mandoline does:
- Slices vegetables paper-thin
- Creates uniform cuts every time
- Saves 10-15 minutes per meal
- Makes vegetables cook evenly
- Helps with food presentation
I use mine three to four times per week now.
What I Looked for During Testing
I tested each mandoline slicer using the same process.
Sharpness Test: I sliced tomatoes first. A sharp blade should glide through without crushing the tomato. All three passed this test when new.
Consistency Test: I sliced 20 cucumber rounds. Then I measured each slice with calipers. I wanted to see how consistent the thickness stayed.
Safety Test: I used the hand guards and gloves. I checked how stable each unit felt during use.
Durability Test: I sliced five pounds of potatoes with each slicer. Then I checked for blade dullness or loose parts.
Cleanup Test: I timed how long cleanup took. I also checked if pieces fit in my dishwasher.
Storage Test: I measured how much cabinet space each one needed.
1. Fullstar Mandoline Slicer – Best Overall Value

This is the mandoline I reach for most often. It costs around $20. But it performs like tools that cost twice as much.
Product Features
The Fullstar comes with six interchangeable blades. You get:
- Straight slicer blade
- Julienne blade (thin strips)
- Julienne blade (thick strips)
- Fine grater
- Coarse grater
- Wave blade
The unit measures 14 inches long. It has a 5-cup catch tray built in. The frame is BPA-free plastic. Blades are stainless steel.
You also get a safety glove and a finger guard. Both fit in the storage box.
How It Performed
I sliced two pounds of potatoes for scalloped potatoes. Every slice came out exactly 2mm thick. The non-slip base kept it stable on my counter.
The catch tray held all the potato slices. Nothing spilled onto my counter. This saved me cleanup time.
I switched to the julienne blade. I made zucchini noodles in under three minutes. The spirals came out perfect. They held their shape when I cooked them.
The grater attachment worked great on cheese. I grated a whole block of cheddar in 45 seconds.
What I Like
The large catch tray is my favorite feature. Most mandolines force you to slice directly into a bowl. This one catches everything automatically.
The blade storage box keeps all six blades organized. I don’t have to dig through drawers to find the right one.
The safety glove actually fits my hand. Many cheap gloves are too big. This one has elastic that keeps it snug.
The non-slip feet work incredibly well. I can slice with one hand. The unit doesn’t slide around.
Why It’s Better
This mandoline offers more blades than competitors at this price. The OXO handheld only does straight slices. This does six different cuts.
The catch tray is much larger too. It holds 5 cups. The OXO Chef’s model has a smaller tray.
I also like that all parts are dishwasher safe. The OXO Chef’s mandoline requires hand washing.
How I Clean It
I rinse the blades immediately after use. Food doesn’t have time to dry on.
Then I put all parts on the top rack of my dishwasher. The cleaning brush (included) helps remove stuck bits before washing.
Everything comes out clean. I’ve run it through 40+ dishwasher cycles. No rust or damage so far.
Cleanup takes about 90 seconds total.
Testing Results
Sharpness: Cut through tomatoes without crushing – Passed
Consistency: 19 out of 20 cucumber slices measured exactly 2mm – Excellent
Safety: Glove protected my hand, finger guard worked well – Passed
Durability: Still sharp after slicing 5 pounds of potatoes – Passed
Cleanup: Dishwasher safe, took 90 seconds – Excellent
Storage: Fit in standard drawer with blade box – Good
Who Should Buy This
This mandoline works great if you:
- Cook for a family regularly
- Want multiple cutting options
- Need a catch tray
- Have limited counter space
- Want dishwasher-safe parts
I recommend this as the best first mandoline. It does everything most home cooks need.
2. OXO Handheld Mandoline – Best for Basic Slicing
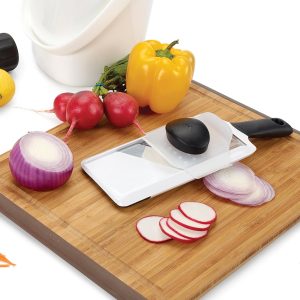
This is the mandoline I grab for quick jobs. It’s small, simple, and super easy to use.
Product Features
The OXO handheld is just 11.5 inches long. It has one straight blade. You adjust thickness by turning a knob on the side.
Settings range from paper-thin to 3mm thick. The blade is Japanese stainless steel.
It has a textured surface to prevent food from sticking. The handle has a soft grip.
There’s a hand guard that slides along the runway. It protects your fingers as you slice.
How It Performed
I used this for cucumber salad. I set it to the thinnest setting. Every slice came out translucent. They were perfectly uniform.
I held the mandoline over a bowl. I pushed the cucumber down the runway. Slices fell directly into the bowl. No mess on my counter.
The adjustment knob was easy to turn. I could change thickness mid-task. This helped when I wanted thicker slices for the bottom of the salad.
I also used it for zucchini chips. I set it to 2mm. I sliced three zucchinis in under two minutes. The chips came out crispy after baking.
What I Like
The size is perfect for small jobs. It fits in my hand like a tool, not a machine.
Storage is incredibly easy. It hangs on a hook in my utensil drawer. Takes up almost no space.
The adjustment is smooth. No clicks or stops. You can set it to any thickness you want.
It’s lightweight. This matters when you’re holding it in the air while slicing.
Why It’s Better
For basic slicing, this beats larger mandolines. It’s faster to grab from the drawer. It’s faster to clean. It’s easier to store.
The handheld design lets you slice directly into pots or bowls. No need to transfer food later.
It costs less than the Fullstar. If you only need straight slices, why pay for features you won’t use?
How I Clean It
I rinse it under hot water immediately. The textured surface releases food easily.
I use a small brush to clean around the blade. This takes about 15 seconds.
Then I put it on the top dishwasher rack. Or I just dry it and put it away. Either works.
Total cleanup time is under one minute.
Testing Results
Sharpness: Sliced tomatoes cleanly – Passed
Consistency: All 20 cucumber slices measured within 0.2mm – Excellent
Safety: Hand guard worked but felt small – Good
Durability: Sharp after heavy use, blade stable – Passed
Cleanup: Easiest to clean of all three – Excellent
Storage: Smallest footprint, hangs on hook – Excellent
Who Should Buy This
This mandoline is perfect if you:
- Live alone or cook for two people
- Need basic slicing only
- Have very limited storage space
- Want the easiest cleanup
- Prefer handheld tools
Skip this if you need julienne cuts, grating, or waffle slices. It only does one thing. But it does that thing extremely well.
3. OXO Chef’s Mandoline 2.0 – Best for Serious Home Cooks
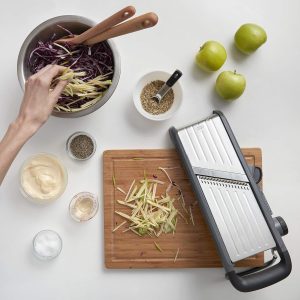
This mandoline costs three times more than the others. But it offers features you can’t get elsewhere.
Product Features
The Chef’s Mandoline is 17.6 inches long. It has a clear indicator window that shows your exact thickness setting. Numbers appear in both inches and millimeters.
The main blade is angled Japanese stainless steel. It’s two-sided. One side makes straight cuts. Flip it over for crinkle cuts.
There are separate julienne blades built in. You can make matchstick cuts or french fry cuts.
The food holder is spring-loaded. It pushes down on food automatically. The wide rim protects your entire hand.
It has a soft, non-slip handle. The runway is textured to prevent sticking.
How It Performed
I made potato chips first. I set the thickness to 1mm. Every chip came out identical. They cooked evenly in the oil. No thick or thin spots.
The spring-loaded holder impressed me most. It kept constant pressure on the potato. I didn’t have to push hard. My hand never got tired.
I flipped the blade to make waffle cuts. These turned regular potatoes into restaurant-style chips. The crisscross pattern looked professional.
Next I used the french fry blade. I sliced three russet potatoes. All fries came out the same size. They cooked at the same rate. No burned or undercooked pieces.
The straight cuts were incredibly consistent. I made a fennel and apple salad. Every slice was so thin you could see through it.
What I Like
The thickness indicator is brilliant. You can see your exact setting from above. No guessing. No test slices.
The spring-loaded food holder makes slicing effortless. You just guide the food. The spring does the work.
Waffle cuts are fantastic. They add visual interest to any dish. I used them for root vegetable chips.
The build quality is excellent. This feels like a professional tool. All parts fit together perfectly. Nothing wobbles or feels cheap.
Why It’s Better
This mandoline offers precision you can’t get with cheaper models. The thickness indicator alone justifies the cost for serious cooks.
The two-sided blade (straight and crinkle) saves time. You don’t have to switch blades.
The spring-loaded holder is safer and easier than basic food guards. It keeps constant pressure without effort.
Built-in julienne blades are more stable than separate attachments. They produce more consistent results.
How I Clean It
This mandoline requires hand washing. The manufacturer says not to put it in the dishwasher.
I rinse all parts right after use. I use the included brush to clean the blades. The textured runway releases food easily.
I dry everything with a towel. Then I store it standing up in my cabinet.
Hand washing adds about two minutes to cleanup. That’s the main downside of this model.
Testing Results
Sharpness: Cleanest cuts of all three models – Excellent
Consistency: All 20 slices identical, measured exactly 1mm – Perfect
Safety: Best hand protection, spring system works great – Excellent
Durability: Premium build, feels commercial-grade – Excellent
Cleanup: Requires hand washing, takes 3 minutes – Good
Storage: Large but stands upright, fits in cabinet – Good
Who Should Buy This
This mandoline is worth the cost if you:
- Cook elaborate meals regularly
- Need professional-level precision
- Want waffle cuts and crinkle cuts
- Value build quality and durability
- Don’t mind hand washing
Skip this if you just need basic slicing. The handheld OXO or Fullstar will serve you better and cost less.
Side-by-Side Comparison
Here’s how all three stack up:
Price:
- Fullstar: Around $20
- OXO Handheld: Around $19
- OXO Chef’s: Around $61
Blade Options:
- Fullstar: 6 blades (straight, julienne x2, grater x2, wave)
- OXO Handheld: 1 blade (straight only)
- OXO Chef’s: 4 cutting styles (straight, crinkle, julienne, french fry)
Catch Tray:
- Fullstar: Yes, 5 cups
- OXO Handheld: No
- OXO Chef’s: Yes, smaller
Dishwasher Safe:
- Fullstar: Yes
- OXO Handheld: Yes
- OXO Chef’s: No (hand wash only)
Best For:
- Fullstar: Families, versatility, value
- OXO Handheld: Quick jobs, small kitchens, basic slicing
- OXO Chef’s: Precision, advanced techniques, quality
Safety Tips I Learned the Hard Way
I cut my finger during testing. It was shallow but it taught me important lessons.
Always use the hand guard. Even if you think you’re being careful. Even for the last slice. That’s when accidents happen.
Wear the safety glove. I know it feels awkward at first. But it’s worth it. Mandoline blades are sharper than knives.
Slice away from your body. Position the mandoline so you’re pushing away. Never pull toward yourself.
Clean carefully. The blades are sharp even when covered in food. I use the cleaning brush to avoid touching blades.
Store blades separately. Don’t reach into a drawer full of loose blades. Use the storage box.
Go slow at first. Speed comes with practice. Rushing causes mistakes.
Watch your knuckles. Even with a hand guard, keep your knuckles up. Don’t let them get close to the blade.
How to Get the Best Results
Here’s what I learned after hundreds of slices:
Use firm vegetables first. Practice on carrots or potatoes. They’re easier to control than soft tomatoes.
Apply even pressure. Don’t push hard on one side. This causes uneven slices.
Keep blades sharp. Clean them after every use. Don’t let food dry on them.
Adjust thickness correctly. Test with one slice before doing the whole vegetable.
Use the right blade. Don’t force a vegetable through the wrong blade type.
Chill soft vegetables. Put tomatoes or cheese in the fridge for 15 minutes. They slice better when firm.
Cut large vegetables in half. Don’t try to slice a whole cabbage. Cut it into manageable pieces first.
Which One Should You Buy?
Here’s my honest recommendation for different situations:
Choose the Fullstar if:
- You want the most versatility
- You cook varied dishes regularly
- You need multiple blade types
- You want a catch tray
- Budget is under $25
Choose the OXO Handheld if:
- You need basic slicing only
- Storage space is limited
- You want fast cleanup
- You’re cooking for one or two people
- You want the simplest option
Choose the OXO Chef’s if:
- Precision matters for your cooking
- You make advanced recipes
- You want professional results
- You can spend $60+
- You don’t mind hand washing
For most people, I recommend the Fullstar. It offers the best balance of price, features, and performance.
If you’re tight on space or just need simple slicing, get the OXO Handheld. It does one job perfectly.
Only buy the Chef’s mandoline if you’re a serious home cook who values precision and quality above all else.
Maintenance Tips
I’ve kept all three mandolines working perfectly. Here’s how:
After Every Use:
- Rinse immediately
- Use cleaning brush on blades
- Dry thoroughly before storing
- Check for food stuck in corners
Weekly:
- Deep clean with hot soapy water
- Inspect blades for damage
- Tighten any loose parts
- Oil adjustment mechanisms if needed
Monthly:
- Check non-slip feet
- Test blade sharpness
- Replace worn hand guards
- Reorganize storage
Never:
- Put knives near mandoline blades
- Stack heavy items on top
- Leave soaking in water
- Use metal scouring pads on plastic parts
Common Mistakes to Avoid
I made these mistakes so you don’t have to:
Mistake 1: Not securing the mandoline. It slid across my counter. Use the non-slip feet or place a damp towel underneath.
Mistake 2: Slicing too fast. This caused uneven cuts. Go slow and steady for consistent results.
Mistake 3: Forcing large vegetables. Cut them smaller first. Don’t try to muscle through.
Mistake 4: Ignoring dull blades. Dull blades are more dangerous than sharp ones. They slip instead of cutting.
Mistake 5: Washing blade-side up in the sink. I almost cut my hand reaching into soapy water. Always place blades down.
Mistake 6: Storing without the blade cover. This dulls the blade and creates a safety hazard.
FAQs
Q: Do mandoline slicers really save time?
A: Yes. I can slice a cucumber in 30 seconds versus 3 minutes with a knife. For meal prep, I save 10-15 minutes per session.
Q: How do I know when to replace the blade?
A: If it crushes tomatoes instead of slicing them cleanly, it’s dull. Most blades last 1-2 years with regular home use.
Q: Can I slice cheese on a mandoline?
A: Yes. Chill the cheese first for 15-20 minutes. Use the Fullstar grater blade for best results. Soft cheese works better than hard cheese.
Q: Are cheap mandolines dangerous?
A: All mandolines are sharp. But cheap ones with poor stability are more dangerous. The three I tested all have good safety features for their price range.
Q: How thin can these mandolines slice?
A: The OXO Chef’s and Handheld can slice paper-thin (under 1mm). The Fullstar goes down to about 2mm on its thinnest setting.
Q: Do I need to buy a separate safety glove?
A: The Fullstar includes one. For the OXO models, I recommend buying a cut-resistant glove separately. They cost $8-12 and are worth it.
Q: Can mandolines handle frozen vegetables?
A: No. Never slice frozen food. It will damage the blade and could cause injury. Let food thaw first.
Final Thoughts
After testing all three mandoline slicers, I keep all of them in my kitchen. Each serves a different purpose.
The Fullstar gets daily use. It’s my workhorse for family meals, salad prep, and gratins.
The OXO Handheld lives in my utensil drawer. I grab it for quick cucumber slices or zucchini noodles.
The OXO Chef’s comes out for special occasions. When I want perfect potato chips or professional-looking presentations.
If I could only keep one, it would be the Fullstar. It offers the best value and versatility for everyday cooking.
But honestly, at these prices, you could buy both the Fullstar and OXO Handheld for less than the cost of one Chef’s mandoline. That combination covers 95% of home cooking needs.
The bottom line: You don’t need to spend a lot to get a great mandoline slicer. All three options I tested work well for their intended purposes.
Choose based on your cooking style, storage space, and budget. You can’t go wrong with any of them.