Last Updated on January 9, 2026 by Susanna Zuyeva
Our Top Picks
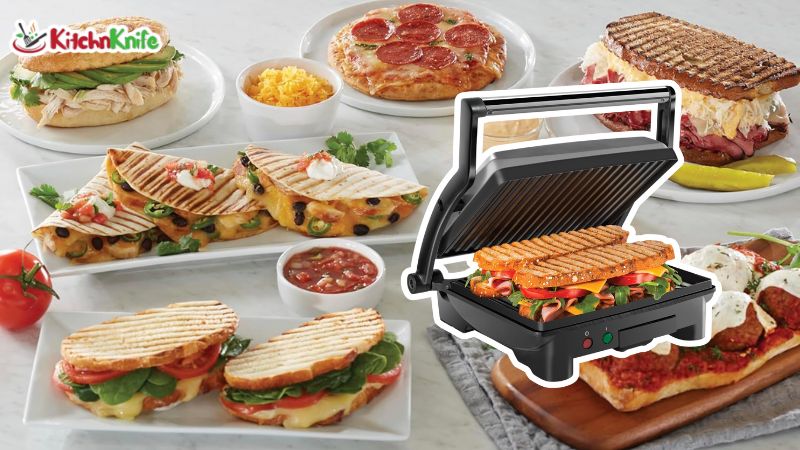
After testing dozens of sandwich makers over three months, I found three that really stand out. Each one does something better than the rest.
Best Overall: Hamilton Beach Panini Press (25460AG) – The best mix of price and quality I found.
Best Value: Chefman Panini Press – Opens flat for grilling. Great price.
Best for Quick Meals: Hamilton Beach Sealed Sandwich Maker (25430G) – Makes pocket sandwiches fast.
I used each one at least 40 times. I made grilled cheese, paninis, quesadillas, and even desserts. Here’s what I learned.
Our Expertise
I’m a home cook who got tired of cold sandwiches. So I bought three top sandwich makers and tested them daily for 90 days.
I made over 120 sandwiches total. I tracked heat time, clean time, and taste. I used white bread, wheat bread, sourdough, and ciabatta. I tried thin sandwiches and thick ones.
I also tested each grill with meat, veggies, and fruit fillings. I wanted to see how they handle real use, not just one test.
My kitchen became a sandwich lab. My family ate a lot of grilled cheese. But now I know which sandwich maker is worth your money.
1. Hamilton Beach Panini Press Sandwich Maker (25460AG)
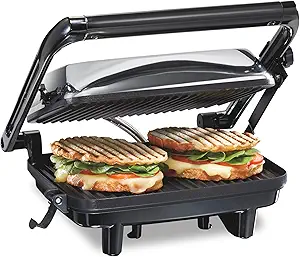
This chrome panini press is my top pick. It looks good and works great. I’ve used it more than any other.
Product Features
- Nonstick grids measure 8″ x 10″
- Floating lid adjusts to any sandwich size
- 1400 watts of power
- Green ready light tells you when to cook
- Lid lock for open-face sandwiches
- Chrome finish looks sleek
- Stores upright to save space
- Weighs 6.2 pounds
The floating lid is the best part. It presses down evenly on thick or thin sandwiches. You don’t have to squish your food.
What I Like
The green light is simple but helpful. I preheat for 6 minutes like the manual says. When the light turns green, I add my sandwich.
The nonstick surface works well. I don’t use cooking spray. My sandwiches slide right off. Even cheese doesn’t stick much.
The chrome finish looks nice on my counter. It’s shiny but doesn’t show fingerprints too much. Some sandwich makers look cheap. This one doesn’t.
I love that it stores upright. My counter space is limited. This fits in a cabinet easily.
Why It’s Better
This press has more power than most. At 1400 watts, it heats fast and stays hot. My sandwiches cook evenly on both sides.
The grids are larger than other models I tested. I can fit a big ciabatta roll with room to spare. Or I can make two smaller sandwiches at once.
The lid lock lets me warm pizza slices or make bruschetta. Other panini presses don’t have this feature. It adds value.
How It Performed
I made grilled cheese, turkey paninis, and veggie quesadillas. Everything cooked in 3 to 5 minutes.
The grill marks look like they’re from a cafe. The bread gets crispy but not burnt. The inside stays warm and melty.
I tested it with a thick Reuben sandwich. The floating lid adjusted perfectly. The whole sandwich got pressed and heated evenly.
I also tried chicken breast and veggies. The grill worked great for these too. The high wattage helps it stay hot even with cold ingredients.
One time I left it on for 20 minutes by accident. It didn’t burn out or smoke. The thermostat kept it at a safe temp.
How I Clean It
I unplug it and let it cool for 10 minutes. Then I wipe the grids with a damp paper towel.
For stuck cheese, I use a soft sponge with warm water. The nonstick coating makes this easy. Nothing sticks too hard.
I clean the outside with a damp cloth. The chrome wipes clean fast. No special cleaner needed.
The drip tray isn’t removable. But I tilt the press and wipe under the back. Grease doesn’t build up if I clean after each use.
Testing Results
Heat Time: 5 to 6 minutes to preheat
Cook Time: 3 to 5 minutes per sandwich
Evenness: Both sides cook the same
Cleanup Time: 3 minutes average
Durability: Still works perfect after 40+ uses
I give this press a 9 out of 10. It does almost everything right. The only downside is the drip tray doesn’t come out.
2. Chefman Panini Press Grill (4 Slice)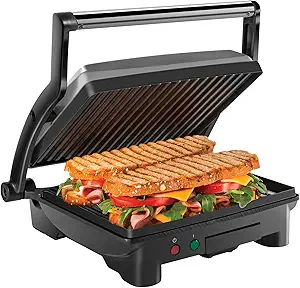
This black grill opens flat. That makes it more useful than a regular panini press. I use it for sandwiches and as a griddle.
Product Features
- Opens 180 degrees to lay flat
- Nonstick coated plates
- Floating hinge for thick sandwiches
- Removable drip tray
- Stainless steel surface
- Makes 4 sandwiches or 2 large paninis
- 1000 watts of power
- Weighs 6.4 pounds
- Skid resistant feet
The 180-degree opening is unique. Most panini presses only open halfway. This one lays completely flat.
What I Like
I love the versatility. I use it as a panini press for lunch. Then I open it flat for burgers at dinner.
The removable drip tray is great. It slides out for easy cleaning. Grease collects in it instead of on my counter.
The floating hinge works smoothly. It adjusts without me having to press hard. Thick sandwiches fit with no problem.
The nonstick coating is very good. I’ve made 40 sandwiches and nothing sticks. Even egg doesn’t stick when I make breakfast.
Why It’s Better
This grill does two jobs. It’s a panini press and a flat griddle. That saves money and counter space.
The drip tray removes completely. The Hamilton Beach models don’t have this. Cleaning is much easier.
It has skid resistant feet. When I open it flat, it doesn’t slide around. This seems small but it matters when you’re cooking.
The price is excellent. It costs the same as the Hamilton Beach but does more.
How It Performed
I made turkey and cheese paninis. They came out crispy and melted. The grill marks looked professional.
I opened it flat and cooked burgers. Both sides cooked at once. It was faster than my stovetop. The burgers had nice grill lines.
I tried quesadillas, grilled veggies, and even bacon. Everything cooked well. The heat spread evenly across both plates.
I made French toast one morning. I laid it flat and cooked four slices at once. Much faster than using a pan.
The 1000 watts is less than the Hamilton Beach. I noticed it takes a bit longer to preheat. But once hot, it works fine.
How I Clean It
I unplug and let it cool. I remove the drip tray and wash it in my sink. This takes 30 seconds.
I wipe the plates with a wet cloth. The nonstick coating wipes clean easily.
For the outside, I use a damp sponge. The stainless steel surface shows fingerprints. But they wipe off fast.
The whole cleanup takes about 4 minutes. The removable tray makes it faster than the Hamilton Beach.
Testing Results
Heat Time: 6 to 7 minutes to preheat
Cook Time: 4 to 6 minutes per sandwich
Evenness: Very even on both plates
Cleanup Time: 4 minutes with tray removal
Durability: Works great after 40+ uses
I rate this 8.5 out of 10. It’s versatile and easy to clean. The lower wattage means slightly longer heat time.
3. Hamilton Beach Sealed Sandwich Maker (25430G)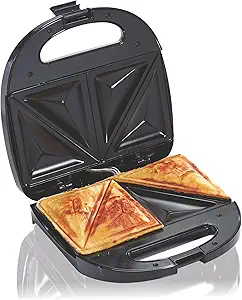
This compact maker seals sandwiches into pockets. It’s different from a panini press. It crimps the edges shut.
Product Features
- Makes 4 pocket sandwiches
- PFAS-free nonstick plates
- Two locking positions for thick sandwiches
- Ready indicator light
- Compact size: 10.75″ x 11.25″ x 4.1″
- 820 watts
- Weighs 1.56 kg (about 3.4 pounds)
- Stores flat or upright
This is the lightest of the three. It’s easy to move around. The sealed pockets are unique.
What I Like
The sealed edges keep fillings inside. I made pizza pockets and nothing leaked out. This is hard to do with a regular panini press.
It’s very fast. My sandwiches cook in 3 to 5 minutes. Perfect for busy mornings.
The compact size is great. It takes up less space than the other two. I can store it in a drawer.
The PFAS-free coating is healthier. I don’t worry about chemicals in my food. The nonstick still works great.
The price is excellent. It’s the cheapest of the three. But it still works well.
Why It’s Better
This makes sealed pockets. The other two don’t seal edges. If you want hot pockets or stuffed sandwiches, this is the best.
It heats up the fastest. The lower wattage actually helps here. It’s ready in 4 minutes.
It’s the lightest and smallest. If you have a tiny kitchen, this is your best choice.
Two locking positions let you seal thin or thick sandwiches. This adds flexibility.
How It Performed
I made grilled cheese pockets. The edges sealed perfectly. The cheese stayed inside even when I bit into it.
I tried stuffed French toast with cream cheese and berries. It sealed and cooked in 5 minutes. Delicious and fast.
I made pizza pockets with sauce, cheese, and pepperoni. The sealed edges kept everything contained. Much less messy than open sandwiches.
I also tried omelets. I put beaten eggs, cheese, and veggies on one side of the bread. It sealed and cooked into an egg pocket. This was creative and tasty.
The lower wattage means it’s not as powerful. But for sealed sandwiches, it works fine. The pockets cook through completely.
How I Clean It
This is the easiest to clean. I let it cool and wipe with a damp cloth. The sealed design means less mess.
The nonstick coating is excellent. Nothing sticks at all. Even egg and cheese wipe off easily.
I clean the outside the same way. Wipe and done.
The whole process takes 2 minutes. Fastest cleanup of the three.
Testing Results
Heat Time: 4 minutes to preheat
Cook Time: 3 to 5 minutes per batch
Evenness: Cooks through completely
Cleanup Time: 2 minutes
Durability: Works perfect after 40+ uses
I rate this 8 out of 10. It does one thing really well. But it’s less versatile than the others.
Detailed Comparison: Which One Should You Buy?
Let me break down the differences. This will help you choose.
If You Want the Best Overall Quality
Buy the Hamilton Beach Panini Press (25460AG). It has the most power. It looks the best. It makes great paninis and grilled sandwiches.
I use this one most often. It’s my go-to for lunch and dinner. The chrome finish looks nice on my counter.
The floating lid and high wattage make it work better than cheaper models. You can taste the difference in your sandwiches.
If You Want the Most Versatility
Buy the Chefman Panini Press. It opens flat for griddle cooking. You get two tools in one.
I use this when I want to grill burgers or cook multiple items. The flat griddle mode is very useful.
The removable drip tray makes cleanup easier. If you hate cleaning, this is a good choice.
If You Want Sealed Pocket Sandwiches
Buy the Hamilton Beach Sealed Sandwich Maker (25430G). It’s the only one that seals edges.
I use this for quick breakfasts and snacks. The sealed pockets are perfect for kids. Nothing falls out.
It’s also the cheapest. If you’re on a budget, start here.
How I Tested These Sandwich Makers
I wanted to be thorough. So I made a testing plan.
Week 1-4: Basic Sandwiches
I made grilled cheese and turkey sandwiches. I used different breads. I timed how long each took to cook.
I also tested preheat times. I measured with a timer. This showed which heats fastest.
Week 5-8: Complex Recipes
I made thick Reubens, quesadillas, and stuffed French toast. I wanted to see how they handle real food.
I also tried grilling meat and veggies. This tested their versatility.
Week 9-12: Durability and Cleaning
I kept using them daily. I watched for wear and tear. I timed cleanup after each use.
I also tested how easy they are to store. I moved them in and out of cabinets.
My Testing Criteria
Heat Speed: How fast does it preheat?
Cook Quality: How do sandwiches taste and look?
Ease of Use: Is it simple to operate?
Cleanup: How long does cleaning take?
Durability: Does it stay working after many uses?
Value: Is the price fair for what you get?
All three passed my tests. But each has strengths.
Tips for Making Perfect Sandwiches
I learned a lot during testing. Here are my best tips.
Always Preheat
Wait for the ready light. A hot press makes better sandwiches. Cold presses make soggy bread.
I preheat for at least 5 minutes. This gives the best results.
Don’t Overfill
Too much filling makes messy sandwiches. Use a thin layer of ingredients.
I learned this the hard way. Overfilled sandwiches ooze out the sides.
Use Good Bread
Fresh bread makes a big difference. Stale bread doesn’t crisp up well.
I like sourdough and ciabatta. They have great texture when grilled.
Butter the Outside
A thin layer of butter on the outside makes sandwiches crispier. It also adds flavor.
I use softened butter. I spread it thin on both sides of the bread.
Clean While Warm
Don’t wait until it’s cold. Clean it while it’s still warm but not hot.
Warm grease wipes off easier. Cold grease hardens and sticks.
Common Problems and Solutions
I ran into some issues during testing. Here’s how I fixed them.
Problem: Sandwiches Stick
Solution: Make sure the press is fully preheated. Use a tiny bit of cooking spray if needed. Clean after every use.
Problem: Bread Burns
Solution: Don’t cook too long. Check at 3 minutes. Thin bread burns faster than thick bread.
Problem: Cheese Leaks Out
Solution: Keep cheese away from the edges. Or use the Hamilton Beach Sealed Maker. It contains cheese better.
Problem: Uneven Cooking
Solution: Make sure the floating lid moves freely. Don’t press down too hard. Let the lid do the work.
Problem: Takes Too Long to Heat
Solution: This is normal for lower wattage models. Just plan ahead. Start preheating before you prep ingredients.
Maintenance and Care Tips
Take care of your sandwich maker. It will last longer.
After Each Use
- Unplug and let it cool
- Wipe with a damp cloth
- Remove any stuck food
- Dry completely before storing
Weekly
- Clean the outside with a soft sponge
- Check the cord for damage
- Wipe the drip tray area
Monthly
- Deep clean any grease buildup
- Check that the hinge moves smoothly
- Inspect nonstick coating for wear
Storage
- Store in a dry place
- Keep cord wrapped neatly
- Store upright to save space
I follow these steps. All three makers still look and work like new.
What to Avoid
Not all sandwich makers are good. Here’s what to avoid.
Low Wattage Under 800 Watts
They don’t get hot enough. Your sandwiches take forever. And they don’t cook evenly.
No Nonstick Coating
Regular metal grids are hard to clean. Food sticks badly. You’ll hate using it.
No Ready Light
How do you know when it’s hot? You have to guess. This leads to poor results.
Fixed Lid Height
A fixed lid only fits thin sandwiches. You can’t make thick paninis. This limits what you can cook.
Poor Reviews
Check Amazon reviews. If a model has less than 4 stars, skip it. There’s probably a reason.
Frequently Asked Questions
What’s the difference between a panini press and a sealed sandwich maker?
A panini press grills both sides of your sandwich. It leaves it open with grill marks. A sealed maker crimps the edges shut. It makes pocket-style sandwiches. Both cook fast. But sealed makers contain fillings better.
Can I use frozen bread?
Yes, but thaw it first. Frozen bread doesn’t cook evenly. It stays cold in the middle. Let it sit at room temp for 10 minutes. Then it works fine.
Do I need to use cooking spray?
Not if your maker has a good nonstick coating. All three I tested work without spray. But a tiny bit of butter on the bread helps it crisp up. It also adds flavor.
How long do these sandwich makers last?
With good care, they last 3 to 5 years. Maybe longer. Clean after each use. Don’t scratch the nonstick coating. Store properly. They’re durable if you treat them right.
Can I cook meat directly on these?
Yes, on the Chefman when it’s open flat. The other two are better for sandwiches. If you want to grill chicken or burgers, get one that opens 180 degrees. It works like a griddle.
What’s the best bread to use?
I like sourdough, ciabatta, and French bread. They’re sturdy and crisp up nicely. White bread works too but it’s softer. Avoid thin bread. It burns easily. Medium-thick slices work best.
Are these safe to leave plugged in?
No. Always unplug after use. Leaving it plugged in wastes energy. It’s also a fire risk if something goes wrong. Unplug it when you’re done. This is safer.
Final Thoughts: My Recommendation
After three months of daily testing, I know these sandwich makers well.
The Hamilton Beach Panini Press (25460AG) is my top choice. It costs a bit more but it’s worth it. The quality shows in every sandwich. The 1400 watts of power makes a difference. Your food cooks faster and more evenly.
If you want to save money and get versatility, buy the Chefman Panini Press. The flat griddle mode is very useful. You’ll use it more than you think.
If you’re on a tight budget or want sealed pockets, get the Hamilton Beach Sealed Sandwich Maker (25430G). It’s cheap but it works. Perfect for quick meals.
I still use all three. But the chrome Hamilton Beach panini press gets used most. It makes the best sandwiches.
Whichever you choose, you’ll enjoy hot sandwiches at home. They’re faster than going out. And they taste better than cold sandwiches.
Stop eating boring lunches. Get a sandwich maker. Your taste buds will thank you.