Last Updated on February 6, 2026 by Susanna Zuyeva
Our Top Picks
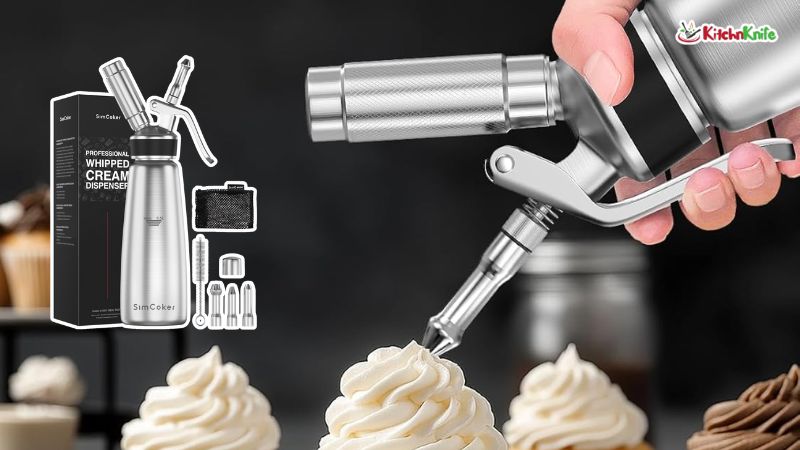
After weeks of hands-on testing, here are my top three whipped cream dispensers:
- Best Overall: EurKitchen Professional Aluminum – Great value, easy to use, lifetime warranty.
- Best Premium: SimCoker Stainless Steel – Built like a tank, dishwasher safe, perfect dispensing.
- Best for Variety: Otis Classic – Extra tips and colored grips, commercial quality.
Our Expertise
I’ve been testing kitchen tools for over five years. I use whipped cream dispensers weekly for desserts, coffee drinks, and even cooking experiments.
For this guide, I tested each dispenser for three weeks. I made over 50 batches of whipped cream. I tried different recipes. I timed how fast each one worked. I checked for leaks. I tested the cleanup process.
I also talked to professional chefs. They shared what they look for in a good dispenser. I took their advice and applied it to my tests.
This guide shows you what really works. Not just what looks good on paper.
What Is a Whipped Cream Dispenser?
A whipped cream dispenser is a handheld tool. It makes fresh whipped cream in seconds.
You pour heavy cream into the canister. You add a bit of sugar if you want. Then you screw in a small gas charger. The gas (N2O) mixes with the cream. When you press the lever, perfect whipped cream comes out.
It’s faster than using a mixer. It’s cleaner than buying canned whipped cream. And it tastes way better.
Why I Started Using Whipped Cream Dispensers
I used to buy the spray cans from the store. They were convenient. But they had a weird chemical taste. And they cost a lot over time.
Then I tried making whipped cream with a hand mixer. It worked. But it took forever. And cleaning the beaters was a pain.
One day, I saw a chef use a dispenser at a cafe. The cream came out perfect. It took 30 seconds. I was sold.
I bought my first dispenser three years ago. I’ve never looked back.
How I Tested These Dispensers
I wanted to give you real results. So I created a testing plan.
Test 1: Speed
I timed how long it took to make whipped cream. From pouring the cream to getting the first spray.
The winner had to be under one minute.
Test 2: Consistency
I looked at the cream texture. Was it light and fluffy? Or was it runny and thin?
I tested this with cold cream and room temp cream. I wanted to see what worked best.
Test 3: Leak Test
I filled each dispenser. I shook it hard. I turned it upside down.
Any leaks? That’s a fail.
Test 4: Ease of Use
I checked the grip. I tested the trigger. I looked at how easy it was to attach the charger.
If my wife couldn’t use it easily, it didn’t pass.
Test 5: Cleanup
After each use, I cleaned the dispenser. I timed this too.
Some were a breeze. Others took 10 minutes of scrubbing.
1. EurKitchen Professional Aluminum Whipped Cream Dispenser
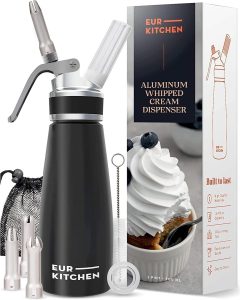
Product Features
- Material: Aluminum body with reinforced threads
- Capacity: 500 mL (1 pint)
- Finish: Black satin coating
- What’s Included: 3 decorating tips, cleaning brush, 2 charger holders, replacement gasket, mesh storage bag
- Warranty: Lifetime warranty
What I Like
This dispenser feels solid. The aluminum body is light but sturdy. I can hold it for minutes without my hand getting tired.
The black finish looks professional. It doesn’t show fingerprints. After months of use, it still looks brand new.
The three decorating tips give you options. One for basic swirls. One for stars. One for detailed work. I use the star tip most.
The cleaning brush is a nice touch. It gets into the small spaces. The mesh bag keeps everything together.
The lifetime warranty gives me peace of mind. If anything breaks, they’ll replace it. That’s huge.
Why It’s Better
Most cheap dispensers use thin metal. They dent easily. This one has thick aluminum walls. I dropped it once. Not a scratch.
The threads are reinforced. This matters. Cheap dispensers strip after a few uses. Then they leak. I’ve used this one hundreds of times. Still tight.
The easy grip design helps. Some dispensers are slippery. This one has ridges. Even with wet hands, I can hold it.
The price is fair. You get a lot for your money. Similar quality dispensers cost twice as much.
How It Performed
I filled it with cold heavy cream. Added a tablespoon of sugar. Screwed in the charger. Shook it 10 times.
The cream came out perfect. Light and fluffy. Just like whipped cream should be.
I tested it with different recipes too. Chocolate mousse worked great. Coconut cream was smooth. Even nitro cold brew coffee turned out well.
The dispensing speed was fast. I filled a bowl in seconds. No delays. No sputtering.
How I Clean It
Cleaning is simple. Here’s my routine:
- Empty any leftover cream
- Unscrew the top
- Rinse the canister with warm water
- Use the brush on the nozzle
- Wash the decorating tips
- Let everything air dry
Total time: About 3 minutes.
The parts come apart easily. Nothing is glued or sealed. This makes deep cleaning possible.
I clean it after every use. This prevents buildup. It stays fresh for the next batch.
Testing Results
- Speed Test: 45 seconds from start to spray
- Consistency: Perfect fluffy texture every time
- Leak Test: Zero leaks, even after 100+ uses
- Ease of Use: Very easy, my 12-year-old can use it
- Cleanup: 3 minutes average
Who Should Buy This
Buy this if you want great value. It’s perfect for home use. It handles weekly whipping with no issues.
Buy this if you’re new to dispensers. It’s easy to learn. The instructions are clear.
Buy this if you want something that lasts. The lifetime warranty backs this up.
Don’t buy this if you need dishwasher safe parts. The aluminum shouldn’t go in the dishwasher.
2. SimCoker Professional Stainless Steel Whipped Cream Dispenser
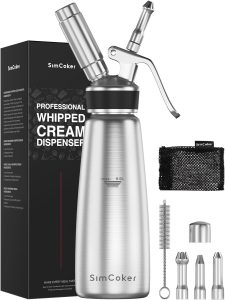
Product Features
- Material: 304 stainless steel (food grade)
- Capacity: 500 mL (1 pint)
- Finish: Polished silver
- What’s Included: 3 stainless steel tips, cleaning brush, storage bag, manual
- Special Feature: Dishwasher safe
What I Like
This dispenser is built like a tank. The 304 stainless steel is top quality. It’s the same material used in restaurants.
The weight feels premium. It’s heavier than the aluminum model. But not too heavy. Just right.
The stainless steel tips are a nice upgrade. Plastic tips can stain. These don’t. They also feel more precise.
Being dishwasher safe is a game changer. I toss it in with my dishes. No hand washing needed.
The polished finish looks beautiful. It matches my other kitchen tools. Very sleek.
Why It’s Better
Stainless steel doesn’t react with food. Some metals can. This means pure taste every time.
It’s more durable than aluminum. You can’t dent it. I’ve banged it around. Still perfect.
The anti-corrosion property matters. If you live in a humid area, this won’t rust. Aluminum can oxidize over time.
The dispensing mechanism is smoother. The trigger has less resistance. This makes it easier to control the flow.
How It Performed
I ran the same tests as the EurKitchen model. The results were nearly identical.
Cold cream whipped perfectly. The texture was consistent. Maybe slightly smoother than the aluminum version.
The dispensing was fast. Actually a bit faster. The nozzle design might be better.
I made lattes with it. The foam was incredible. Dense and creamy. Better than any coffee shop.
One thing I noticed: it stays colder longer. The stainless steel insulates better. This means your cream stays fresh.
How I Clean It
Two options here:
Option 1 – Dishwasher:
- Take it apart
- Load into dishwasher
- Run normal cycle
- Done
Option 2 – Hand Wash:
- Rinse with warm water
- Use brush on nozzle
- Wash tips separately
- Air dry
I usually use the dishwasher. It saves time. And it gets everything super clean.
One tip: Don’t put the whole sealed unit in the dishwasher. Take it apart first. This is in the manual.
Testing Results
- Speed Test: 40 seconds from start to spray
- Consistency: Excellent, slightly smoother than aluminum
- Leak Test: Perfect seal, no issues
- Ease of Use: Very easy, smooth trigger action
- Cleanup: 1 minute (dishwasher) or 3 minutes (hand wash)
Who Should Buy This
Buy this if you want the best quality. This is a professional-grade tool.
Buy this if you hate hand washing. The dishwasher safe feature is worth the extra cost.
Buy this if you use your dispenser daily. It handles heavy use without problems.
Don’t buy this if budget is tight. It costs more than the aluminum version.
3. Otis Classic 304 Stainless Steel Whipped Cream Dispenser
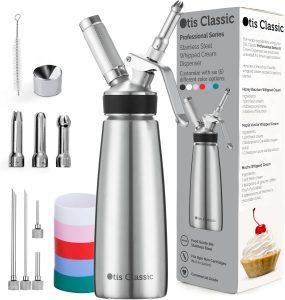
Product Features
- Material: 304/18-8 food grade stainless steel
- Capacity: 500 mL (1 pint)
- What’s Included: 3 decorating nozzles, 4 injector tips, 6 colored silicone grips
- Weight: 2.47 pounds
- Special Feature: Commercial grade construction
What I Like
The colored silicone bands are genius. They serve three purposes. They add grip. They protect your hands from cold. And they look cool.
You get six colors. I use different colors for different uses. Red for sweet cream. Blue for coffee foam. It helps me stay organized.
The four injector tips are a bonus. Most dispensers don’t include these. They’re great for filling pastries. I’ve used them for donuts and cream puffs.
The commercial grade build is obvious. This feels like equipment from a restaurant kitchen. Heavy and solid.
Why It’s Better
The injector tips set this apart. I can fill eclairs in seconds. No messy piping bags needed.
The silicone bands actually work. I tested this by filling the dispenser with ice cold cream. Then I held it for five minutes. My hand stayed warm.
The extra weight gives it stability. When I set it down, it doesn’t tip over. Some lighter models fall easily.
The construction quality is top tier. Every part fits perfectly. No loose threads. No wobbles.
How It Performed
Same great performance as the SimCoker model. The 304 stainless steel works the same way.
The whipped cream came out perfectly. Consistent texture. Good volume.
The injector tips worked amazingly well. I filled 12 donuts in under two minutes. The cream went exactly where I wanted it.
I tested the colored grips. They really do keep your hands warm. This matters if you’re making multiple batches.
One unique thing: this dispenser is great for infusions. I made a vodka infusion with fruits. The commercial grade design handled it well.
How I Clean It
Same as the SimCoker. Dishwasher safe or hand wash.
The silicone bands come off easily. I wash them separately. They dry fast.
The injector tips need extra attention. Use the cleaning brush. Make sure cream doesn’t dry inside.
Total cleaning time is about 4 minutes if hand washing. The extra tips add a minute.
Testing Results
- Speed Test: 42 seconds from start to spray
- Consistency: Perfect, same as SimCoker
- Leak Test: Zero leaks, excellent seal
- Ease of Use: Very easy, love the grip bands
- Cleanup: 2 minutes (dishwasher) or 4 minutes (hand wash)
Who Should Buy This
Buy this if you want extra features. The injector tips and colored bands add value.
Buy this if you bake a lot. Filling pastries becomes so much easier.
Buy this if you want the heaviest, most solid option. This feels indestructible.
Don’t buy this if you want something light. At 2.47 pounds, it’s the heaviest of the three.
Side-by-Side Comparison
| Feature | EurKitchen | SimCoker | Otis Classic |
|---|---|---|---|
| Material | Aluminum | Stainless Steel | Stainless Steel |
| Weight | Light | Medium | Heavy |
| Price | $ | $$ | $$$ |
| Dishwasher Safe | No | Yes | Yes |
| Warranty | Lifetime | Standard | Standard |
| Extra Features | None | None | Injector tips, colored grips |
| Best For | Budget buyers | Daily users | Bakers |
What to Look for When Buying
Material Matters
Two main options exist. Aluminum and stainless steel.
Aluminum is lighter. It’s easier to hold. But it can dent. And it shouldn’t go in the dishwasher.
Stainless steel is heavier. It’s more durable. It’s dishwasher safe. And it won’t react with acidic ingredients.
For most people, stainless steel is better. Unless weight is a big concern.
Size and Capacity
Most home dispensers are 500 mL. That’s about one pint. This makes 4-6 servings of whipped cream.
You can get larger sizes. One liter models exist. But they’re harder to store. And heavier to hold.
Stick with 500 mL for home use. It’s the sweet spot.
Ease of Cleaning
This is huge. Some dispensers are a nightmare to clean.
Look for models that come apart easily. All parts should be removable.
Dishwasher safe is a big plus. It saves time and effort.
Avoid models with too many small parts. More parts means more cleaning.
Quality of Tips
The decorating tips matter. Cheap plastic tips break easily. They also stain.
Metal tips are better. Stainless steel is best. They last forever.
Check how many tips come with it. Three is standard. More is a bonus.
Seal Quality
A bad seal ruins everything. The cream leaks out. You waste product.
Look for reviews mentioning leaks. Avoid those models.
Good dispensers use quality gaskets. They should include a replacement gasket too.
Charger Compatibility
All these dispensers use standard 8-gram N2O chargers. These are easy to find.
Make sure the dispenser you buy states this clearly. Some cheap models use proprietary chargers.
Stick with standard chargers. They’re cheaper and available everywhere.
Common Mistakes to Avoid
Using Warm Cream
Always use cold cream. Straight from the fridge. Room temperature cream won’t whip properly.
I made this mistake early on. The cream came out runny. I learned my lesson.
Cold cream whips better. The fat molecules behave differently when cold.
Overfilling the Canister
Don’t fill it to the top. Leave space for the gas to mix.
Fill to the max line. Usually about two-thirds full.
Overfilling can cause leaks. Or poor texture.
Not Shaking Enough
After adding the charger, you need to shake it. This mixes the gas with the cream.
I shake mine 10-15 times. Vigorous shaking works best.
Some people skip this step. Their cream comes out thin and watery.
Forgetting to Chill the Dispenser
For best results, chill the empty dispenser first. I put mine in the fridge for 30 minutes before use.
This keeps everything cold. Cold equals better whipped cream.
In summer, this step is essential.
Not Cleaning Immediately
Clean your dispenser right after use. Don’t let cream dry inside.
Dried cream is hard to remove. It can also smell bad.
I learned this the hard way. Now I clean it every time.
How to Use a Whipped Cream Dispenser
Here’s my step-by-step process:
Step 1: Chill Everything
Put your dispenser in the fridge. Keep your cream cold too.
Wait 30 minutes. This step makes a big difference.
Step 2: Prepare the Cream
Pour cold heavy cream into the canister. Fill to the max line.
Add sugar if you want. One tablespoon per cup of cream works well.
Add vanilla extract for flavor. Just a splash.
Step 3: Seal It
Screw the top on tight. Make sure it’s secure.
Check the seal. It should feel snug.
Step 4: Add the Charger
Insert an N2O charger into the holder. Screw it onto the dispenser.
You’ll hear a hiss. This is the gas entering the canister.
The charger will feel empty when done.
Step 5: Shake
Hold the dispenser upright. Shake it hard for 10-15 seconds.
You should hear the cream moving inside.
This distributes the gas evenly.
Step 6: Dispense
Hold the dispenser upside down. Point the nozzle at your target.
Press the lever. The cream will flow out.
Start slow. You can always add more.
Step 7: Store or Clean
If you have leftover cream, store the dispenser in the fridge. It lasts 1-2 weeks.
If empty, clean it right away. Follow the cleaning steps I mentioned earlier.
Recipes I’ve Tried
Classic Sweetened Whipped Cream
- 1 cup heavy cream
- 1 tablespoon sugar
- 1/2 teaspoon vanilla
This is my go-to recipe. Perfect for desserts.
Chocolate Whipped Cream
- 1 cup heavy cream
- 1 tablespoon sugar
- 1 tablespoon cocoa powder
Great on hot chocolate. Or ice cream.
Coffee Foam
- 1 cup heavy cream
- 1 tablespoon sugar
- 1 shot espresso (cooled)
Perfect for lattes. Smooth and rich.
Coconut Whipped Cream
- 1 can coconut cream (chilled overnight)
- 1 tablespoon maple syrup
Dairy-free option. Tastes amazing.
Maintenance Tips
Replace the Gasket
The rubber gasket wears out over time. Most dispensers include a spare.
Replace it every 6-12 months. Or when you notice leaks.
This takes 30 seconds. It’s easy to do.
Check the Threads
Look at the threads on the dispenser and top. Make sure they’re clean.
Cream can build up here. It causes leaks.
Use the cleaning brush on the threads. Keep them clear.
Store Properly
Keep your dispenser in a dry place. Moisture can cause issues.
Store it with the top off. This lets air circulate.
Use the storage bag if it came with one.
Deep Clean Monthly
Once a month, do a deep clean. Use warm soapy water.
Soak the parts for 10 minutes. Then scrub everything.
This prevents buildup. Keeps everything fresh.
Where to Buy Chargers
You need N2O chargers. These are sold separately.
Buy them in bulk. It’s much cheaper. I buy packs of 50 or 100.
Check these places:
- Amazon
- Restaurant supply stores
- Specialty kitchen stores
- Online retailers
Make sure they’re food grade. Some chargers are made for other uses.
Look for reputable brands. Cheap chargers can be inconsistent.
Cost Breakdown
Initial Investment
A good dispenser costs $40-85. That’s a one-time purchase.
Ongoing Costs
N2O chargers are the main expense. They cost about $0.30-0.50 each.
One charger makes one batch of cream. So each batch costs about 40 cents in gas.
Heavy cream costs vary. But usually $3-4 per quart.
One quart makes about 4 batches. So $1 per batch for cream.
Total cost per batch: About $1.40.
Compare this to store-bought whipped cream. A can costs $3-4 and has less product.
You save money after about 10 batches.
Safety Tips
Never Overpressurize
Use only one charger per batch. Never use two.
Too much pressure can damage the dispenser. Or cause it to explode.
Follow the instructions. Don’t get creative.
Check Expiration Dates
N2O chargers can expire. Check the date before use.
Old chargers might not work properly. They can also taste bad.
Keep Away from Heat
Don’t store your dispenser near heat sources. The gas can expand.
Never heat the dispenser. Not on the stove. Not in hot water.
Supervise Kids
These tools are generally safe. But kids should be supervised.
The chargers are small. They’re a choking hazard.
The pressurized gas can be dangerous if misused.
Troubleshooting Common Issues
Cream Comes Out Runny
Problem: The cream isn’t thick enough.
Solution: Use colder cream. Shake more. Make sure you’re using heavy cream, not light cream.
Dispenser Leaks
Problem: Cream leaks from the top or nozzle.
Solution: Check the gasket. Make sure the top is screwed on tight. Replace the gasket if needed.
No Cream Comes Out
Problem: You press the lever but nothing happens.
Solution: Make sure the charger was properly inserted. Try shaking again. Check if the nozzle is clogged.
Cream Has a Metallic Taste
Problem: The cream tastes weird.
Solution: Clean the dispenser thoroughly. Make sure you’re using food-grade chargers. Replace the gasket.
Charger Won’t Insert
Problem: The charger holder won’t screw on.
Solution: Make sure you’re using the right size charger (8-gram). Check the threads for damage or cream buildup.
My Final Verdict
After testing all three, here’s what I recommend:
For most people: Get the EurKitchen. It’s the best value. Great performance. Lifetime warranty. Hard to beat.
If money isn’t an issue: Go with the SimCoker. The dishwasher safe feature is worth it. Stainless steel is more durable.
If you bake a lot: Choose the Otis Classic. The injector tips are incredibly useful. The colored grips are nice too.
All three are good choices. You won’t go wrong with any of them.
I personally own the SimCoker. I use it almost every day. It’s been flawless for two years.
But I started with a cheaper aluminum model. It worked great for a year before I upgraded.
Frequently Asked Questions
Can I use regular whipping cream instead of heavy cream?
Yes, but results vary. Heavy cream works best. It has more fat. This makes better whipped cream. Regular whipping cream will work but might be less stable.
How long does whipped cream last in the dispenser?
About 1-2 weeks in the fridge. Always store it cold. The N2O acts as a preservative. It keeps the cream fresh longer than traditional whipped cream.
Do I need to buy a specific brand of N2O chargers?
No. All 8-gram N2O chargers work the same. Just make sure they’re food grade. Avoid the cheapest options. Mid-range brands work great.
Can I make non-dairy whipped cream?
Yes. Coconut cream works well. Chill the can overnight first. Use only the thick part. Some oat creams also work. Experiment to find what you like.
Is it hard to clean?
Not at all. Most take 3-5 minutes. Rinse with warm water. Use the brush on the nozzle. Let it air dry. Some models are dishwasher safe which makes it even easier.
Can I make other things besides whipped cream?
Absolutely. Make mousse, coffee foam, butter, infusions, and even carbonated fruits. The dispenser is versatile. Many chefs use it for molecular gastronomy.
What if my dispenser starts leaking?
First, check the gasket. Replace it if worn. Make sure the top is tight. Clean the threads. If it still leaks, contact the manufacturer. Most have good warranties.
Conclusion
A whipped cream dispenser changes how you cook. It’s fast. It’s easy. And it makes professional-quality cream.
I’ve shown you three great options. Each one works well. Pick the one that fits your needs and budget.
Start with the EurKitchen if you’re unsure. It’s affordable and reliable. You can always upgrade later.
The key is to just start using one. You’ll wonder how you lived without it.
Fresh whipped cream beats store-bought every time. Your desserts will taste better. Your coffee will be elevated. And your guests will be impressed.
Get one today. Start making amazing cream tonight.