Last Updated on June 10, 2025 by Susanna Zuyeva
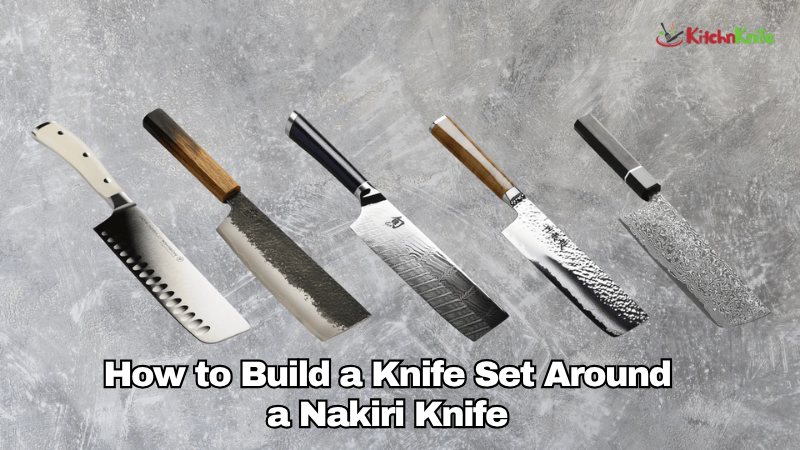
How to Build a Knife Set Around a Nakiri Knife: The Complete Guide
Building a knife set can feel overwhelming. Many home cooks end up with random knives that don’t work well together. But there’s a better way. Start with one great knife and build around it.
The Nakiri knife makes the perfect foundation for any kitchen. This Japanese vegetable knife will change how you prep food. Let’s explore how to build the perfect knife set with a Nakiri at its heart.
What Makes the Nakiri Knife Special?
The Nakiri knife comes from Japan. Its name means “leaf cutter.” This rectangular blade excels at one thing: cutting vegetables with precision.
Unlike curved Western knives, the Nakiri has a flat edge. This design lets you make clean, straight cuts. The thin blade glides through vegetables without crushing them.
Key features of a quality Nakiri:
- Flat, rectangular blade shape
- Thin profile for precise cuts
- Sharp edge that stays sharp longer
- Lightweight feel for extended use
- Perfect for vegetable chopping and fruit slicing
Why Start with a Nakiri?
Most knife sets include knives you rarely use. A Nakiri-centered approach focuses on what you actually need. Here’s why this Japanese knife makes the perfect starting point:
Daily Versatility: You use vegetable prep in almost every meal. The Nakiri handles this task better than any other knife.
Skill Development: Learning proper cutting techniques with a Nakiri improves your overall knife skills.
Quality Focus: Starting with one excellent knife teaches you what to look for in other blades.
Budget Efficiency: You can invest in fewer, better knives instead of many mediocre ones.
Essential Knives to Add to Your Nakiri Foundation
The Chef’s Knife: Your Workhorse
A good chef’s knife complements your Nakiri perfectly. While the Nakiri excels at vegetables, the chef’s knife handles everything else.
Look for these features:
- 8 to 10-inch blade length
- High-carbon stainless steel construction
- Full tang construction for durability
- Ergonomic handle that fits your grip
- Good blade balance for comfortable use
The chef’s knife handles meat, fish, and larger cutting tasks. Together with your Nakiri, these two knives cover 90% of kitchen prep work.
The Paring Knife: Detail Work Expert
Small tasks need a small knife. The paring knife handles intricate work your Nakiri and chef’s knife can’t manage.
Use a paring knife for:
- Peeling fruits and vegetables
- Removing seeds and cores
- Detailed garnish work
- Small, precise cuts
Choose a paring knife with a 3 to 4-inch blade. The same quality standards apply: sharp steel, comfortable handle, and good construction.
The Bread Knife: Serrated Specialist
A bread knife rounds out your essential trio. Its serrated edge cuts through crusty bread without crushing the soft interior.
The bread knife also excels at:
- Slicing tomatoes cleanly
- Cutting delicate fruits
- Portioning cakes and pastries
- Any task where a saw-like motion helps
Look for a 9 to 10-inch serrated blade. The longer length makes clean, single strokes possible.
What to Look for in Quality Knives
Steel Quality Matters
High-carbon stainless steel offers the best balance of sharpness and maintenance. This steel type:
- Holds a sharp edge longer
- Resists rust and stains
- Sharpens easily when needed
- Maintains blade sharpness retention over time
Avoid pure carbon steel unless you enjoy frequent maintenance. Skip cheap stainless steel that won’t hold an edge.
Construction Details
Full tang construction means the blade steel extends through the entire handle. This design provides:
- Better balance and control
- Increased durability
- Safer use under heavy cutting
- Professional knife feel
The handle material should feel comfortable in wet conditions. Avoid materials that become slippery when wet.
Balance and Weight
A well-balanced knife feels natural in your hand. The weight should distribute evenly between blade and handle. Test this by:
- Holding the knife at the bolster (where blade meets handle)
- Feeling for even weight distribution
- Checking that the knife doesn’t tip forward or backward
Smart Storage Solutions
Proper storage protects your investment and keeps you safe.
Magnetic Knife Strip
A magnetic knife strip offers the best storage solution:
- Keeps blades separated and protected
- Easy access during cooking
- Shows off your beautiful knives
- Takes up minimal counter space
- Allows air circulation to prevent moisture buildup
Mount the strip away from the stove to avoid heat damage.
Traditional Knife Block
A knife block works well if you prefer concealed storage:
- Protects blades from damage
- Keeps knives organized
- Safer around children
- Takes up counter space but keeps knives accessible
Choose blocks with horizontal slots to prevent blade damage.
Drawer Storage
In-drawer storage saves counter space:
- Use knife guards or a drawer insert
- Prevents blade contact with other utensils
- Keeps sharp edges protected
- Requires careful organization
Never store knives loose in a drawer. This damages blades and creates safety hazards.
Maintenance: Keeping Your Knives Sharp
Daily Care
Good knife maintenance starts with daily habits:
Hand Wash Only: Never put quality knives in the dishwasher. The harsh detergents and high heat damage both blade and handle.
Dry Immediately: Water spots and rust form quickly on wet blades. Dry knives right after washing.
Proper Cutting Surfaces: Use wood or plastic cutting boards. Glass and stone surfaces dull blades quickly.
Weekly Maintenance
Use a honing rod weekly to maintain blade alignment:
- Hold the rod vertically with tip on cutting board
- Draw knife down rod at 20-degree angle
- Alternate sides with each stroke
- Use light pressure throughout
Honing doesn’t sharpen; it straightens the microscopic edge.
Monthly Sharpening
Learn to use a knife sharpening stone:
- Soak water stones for 10-15 minutes
- Start with coarse grit (400-1000)
- Maintain consistent blade angle
- Progress to finer grits
- Finish with stropping motion
Professional sharpening services work well if you prefer not to sharpen yourself.
Budget Planning: Quality Over Quantity
Investment Approach
Start with your Nakiri knife. Invest in the best quality you can afford. A great Nakiri costs $60-150 for home use.
Add other knives gradually:
- Next: Chef’s knife ($80-200)
- Then: Paring knife ($30-60)
- Finally: Bread knife ($40-80)
This approach spreads costs over time while ensuring each knife meets your standards.
When to Buy Sets vs. Individual Pieces
Buy individual knives when:
- You want specific brands or styles
- You cook certain cuisines frequently
- You have particular size preferences
- You want to spread purchases over time
Consider knife sets when:
- You need multiple knives immediately
- The set includes only knives you’ll use
- The price offers significant savings
- All knives in the set meet your quality standards
Cutting Techniques and Kitchen Prep
Mastering Vegetable Chopping
The Nakiri excels at vegetable prep. Practice these techniques:
The Rocking Motion: Keep blade tip on cutting board. Rock blade down and forward through vegetables.
The Push Cut: Use straight downward motion. Perfect for the Nakiri’s flat blade design.
Julienne Cuts: Stack vegetables and cut into thin strips. The Nakiri’s precision makes this easy.
Tofu Cutting Excellence
Tofu presents unique challenges. The Nakiri handles it perfectly:
- Use gentle pressure to avoid crumbling
- Make clean, straight cuts
- The thin blade minimizes tearing
- Sharp edge prevents dragging
Fruit Slicing Tips
The Nakiri works surprisingly well for fruit:
- Slice apples and pears cleanly
- Cut melons into perfect cubes
- Handle delicate fruits without bruising
- Create attractive fruit presentations
Building Your Perfect Knife Collection
Start with these four essential knives:
- Nakiri knife – Your vegetable specialist
- Chef’s knife – The versatile workhorse
- Paring knife – For detailed work
- Bread knife – Serrated cutting specialist
This foundation handles 95% of home cooking tasks. Add specialty knives only after mastering these basics.
Optional Additions
Consider these knives after building your foundation:
Slicing Knife: Long, thin blade for carving roasts and slicing meat cleanly.
Carving Knife: Shorter than slicing knife, perfect for poultry and smaller roasts.
Boning Knife: Flexible blade for removing bones from meat and fish.
Only add these if your cooking style demands them regularly.
Kitchen Essentials Beyond Knives
Your knife set needs supporting tools:
Cutting Boards: Multiple boards prevent cross-contamination. Use separate boards for vegetables, meat, and fish.
Kitchen Shears: Handle tasks too awkward for knives. Cut herbs, trim fat, and portion poultry.
Knife Sharpener: Whether stones or electric, maintain your edges properly.
Storage Solution: Protect your investment with proper storage.
Safety in the Kitchen
Sharp knives are safer than dull ones. Follow these safety rules:
- Cut away from your body
- Keep fingers curved and tucked under
- Use proper cutting boards
- Store knives securely
- Clean up immediately after use
- Focus on the task – avoid distractions
Making the Right Choice
Building a knife set around a Nakiri creates a focused, efficient kitchen setup. You’ll spend less money on knives you don’t need. You’ll develop better cutting skills. Most importantly, you’ll enjoy cooking more.
Start with a quality Nakiri knife. Learn to use it well. Add other knives as your needs become clear. This approach builds a knife collection that truly serves your cooking style.
Your Nakiri-centered knife set will serve you for years. Quality knives become better with age and proper care. They’re tools that connect you to food preparation in a meaningful way.
The investment in good knives pays dividends every time you cook. Better knives make prep work faster and more enjoyable. They help you create better meals with less effort.
Frequently Asked Questions
What size Nakiri knife should I buy first?
A 6.5 to 7-inch Nakiri works best for most home cooks. This size handles all vegetables comfortably while remaining manageable for smaller hands. Larger sizes work well if you frequently prep large quantities of vegetables.
Can a Nakiri knife replace a chef’s knife completely?
No, the Nakiri specializes in vegetables but struggles with meat, fish, and larger cutting tasks. The flat blade design isn’t ideal for rocking motions needed for herbs and garlic. Use both knives for complete kitchen coverage.
How often should I sharpen my Nakiri knife?
Sharpen your Nakiri every 3-6 months with regular home use. The frequency depends on how often you cook and your cutting technique. Use a honing rod weekly to maintain the edge between sharpenings.
What’s the difference between German and Japanese knife steel?
German steel (around 56-58 HRC) is softer but more durable. It’s easier to sharpen but needs more frequent maintenance. Japanese steel (60-62 HRC) is harder and holds edges longer but requires more careful handling and sharpening technique.
Should I buy dishwasher-safe knives?
Avoid dishwashers for quality knives, even those labeled dishwasher-safe. The harsh detergents, high heat, and contact with other items damage both blade and handle. Hand wash recommended for all good knives.
How do I know if my knife needs sharpening?
Test sharpness by slicing a tomato. A sharp knife cuts cleanly without crushing. If the knife slides or tears the skin, it needs sharpening. Paper cutting tests work too – sharp knives slice paper cleanly.
What cutting board works best with a Nakiri?
Wood cutting boards work excellently with Nakiri knives. They’re gentle on the blade while providing good grip. Plastic boards work well too and are easier to sanitize. Avoid glass, marble, or ceramic boards that quickly dull blades.
Can I use my Nakiri for herbs and garlic?
Yes, but with technique adjustments. The flat blade works well for chopping herbs with straight cuts. For garlic, use the flat side to crush cloves, then chop normally. The Nakiri won’t rock like a chef’s knife but handles these tasks adequately.
What’s the best way to store knives safely?
Magnetic knife strips offer the safest storage. They keep blades separated, visible, and easily accessible. If you have children, consider a locked knife block or in-drawer storage with blade guards.
How much should I spend on my first Nakiri?
Budget $75-150 for a quality Nakiri that will last years. This price range offers excellent steel, construction, and performance without premium brand costs. Avoid knives under $50 – they rarely offer good value or longevity.