Last Updated on November 9, 2025 by Kathay Lee
The Simple Guide to Carving Roast Chicken Like a Pro
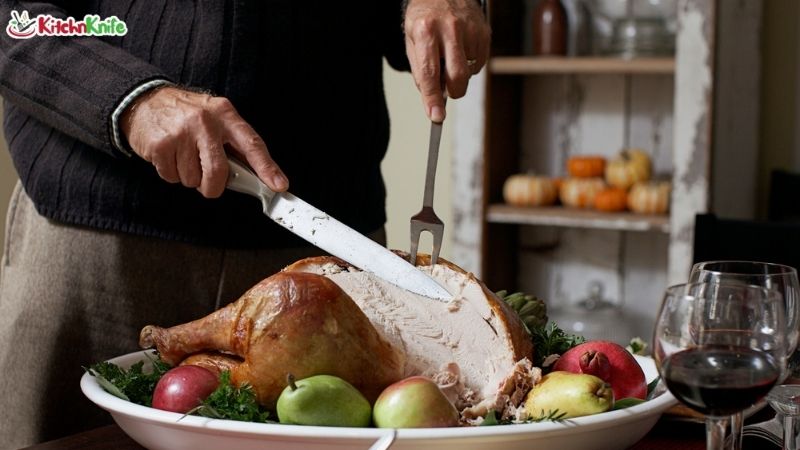
Carving a roast chicken seems hard. But it’s not. You just need the right steps. This guide shows you how to carve both whole and spatchcocked chicken. You’ll get clean cuts every time. Your chicken dinner will look great on the plate.
Many people struggle with carving. They end up with messy pieces. This wastes good meat. Learning proper technique helps you serve better portions. It also makes the meal more enjoyable.
What You Need Before You Start
Get these tools ready:
- A sharp knife (8 to 10 inches works best)
- A large cutting board
- Kitchen shears for tough joints
- Paper towels for grip
A sharp knife is key. Dull knives tear the meat. They also make the job harder. If your knife can’t slice a tomato cleanly, sharpen it first.
Carving a Whole Roast Chicken
Step 1: Let It Rest
Take the chicken out of your cast iron skillet or roasting pan. Let it sit for 10 minutes. This keeps the juices inside. If you cut too soon, all the moisture runs out.
Place the chicken on your cutting board. The breast should face up.
Step 2: Remove the Legs
Pull one leg away from the body. Cut through the skin between the leg and breast. Keep cutting until you hit the joint. Pop the joint by pushing the leg down. Cut through it.
Do this on both sides. You now have two leg quarters.
Step 3: Separate Thighs and Drumsticks
Look at each leg quarter. You’ll see a line of fat. This shows where the joint is. Cut through this line. You’ll feel the knife slide through easily.
Now you have four pieces: two chicken thighs and two drumsticks.
Step 4: Remove the Breast Meat
Find the breastbone in the center. Cut along one side of it. Slice down, keeping your knife close to the bone. The breast will come off in one piece.
Repeat on the other side. You can slice each chicken breast into smaller pieces if needed.
Step 5: Take Off the Wings
Pull each wing away. Cut through the joint where it meets the body. The wings are small but tasty.
Pro Tips
- Use your free hand to pull meat away as you cut
- Follow the natural seams in the meat
- Don’t force cuts through bone
- Save the bones for making stock
Carving Spatchcocked Chicken
Spatchcocked chicken is also called butterfly chicken. The backbone is removed. This creates a flattened chicken that cooks faster.
Why Spatchcocked Is Easier
The flat shape makes carving simple. All the joints are easier to see. You don’t need to flip the bird around as much.
Step 1: Start with the Right Side
Place your flattened chicken skin-side up. The backbone was already removed before cooking.
Step 2: Remove the Legs
Just like with whole chicken, pull each leg out. Cut through the skin and joint. The flat position makes this faster.
Separate the chicken thighs from drumsticks using the same method.
Step 3: Carve the Breast
Cut along both sides of the breastbone. The meat comes off easily because the chicken is flat. Slice each breast into three or four pieces.
Step 4: Remove Wings
Snip through the wing joints. Done!
Spatchcocked chicken takes half the time to carve. It’s perfect when you’re in a hurry.
Making Your Chicken Dinner Special
Now you have perfectly carved pieces. Here’s how to serve them:
Plating Ideas:
- Arrange dark and white meat on a platter
- Add fresh herbs on top
- Place lemon wedges around the edges
Best Side Dishes:
- Roasted vegetables from the same pan
- Simple salad
- Mashed potatoes
- Rice pilaf
Storage Tips:
- Store carved chicken in an airtight container
- Keep it in the fridge for up to three days
- Reheat gently to avoid drying out
Common Mistakes to Avoid
Cutting too soon: Always rest the meat first. This rule applies to all chicken recipes.
Using a dull knife: This tears the meat. It also increases injury risk.
Forcing cuts: If the knife doesn’t go through easily, you’re not at the joint. Reposition and try again.
Throwing away the carcass: Save it for stock. Add vegetables and water. Simmer for rich broth.
Frequently Asked Questions
Q: Can I carve chicken straight from the oven? No. Wait 10 minutes. This keeps the juices in the meat.
Q: Which is easier to carve: whole or spatchcocked? Spatchcocked is easier. The flat shape shows all the joints clearly.
Q: Do I need special tools? No. A sharp knife and cutting board work fine. Kitchen shears help but aren’t required.
Q: How do I know where to cut? Look for natural seams and fat lines. These show where joints are located.
Q: Can I use this method for other poultry? Yes. These steps work for turkey and duck too.
Final Thoughts
Carving chicken is a basic cooking skill. It gets easier each time you do it. Start with a sharp knife and a rested bird. Follow the natural lines in the meat.
Whether you roast in a cast iron skillet or a regular pan, proper carving matters. It helps you serve better portions. It reduces waste. And it makes your chicken dinner look professional.
Try these steps next time you cook. You’ll be surprised how simple it becomes. Your family will notice the difference too.
The key is practice. Don’t worry if your first attempt isn’t perfect. Each chicken you carve teaches you something new. Soon you’ll do it without thinking.
Now you know how to carve both whole and spatchcocked chicken. Pick your favorite chicken marinade. Cook your bird. Then carve it like a pro