Last Updated on October 30, 2025 by Susanna Zuyeva
Why Your Food Processor Blade Choice Matters
Do you own a food processor but only use one blade? You’re not alone. Most people stick with the basic chopping blade because they don’t know what the other attachments do.
This limits what you can make. The right blade saves you time. It gives you better results. It makes cooking easier and more fun.
Your food processor came with several blades. Each one does a specific job. When you match the blade to your task, your food turns out perfect every time.
This guide shows you exactly which blade to use. You’ll learn what each blade does. You’ll discover how to pick the right one for your cooking style. And you’ll avoid common mistakes that waste food and time.
Let’s start with the basics.
Understanding Food Processor Blade Basics
Food processor blades have two main jobs. They cut food into smaller pieces. And they mix ingredients together.
Each blade has a unique shape. This shape determines what the blade can do. Some blades chop. Others slice. Some shred or grate.
Most blades are made from stainless steel. This material stays sharp longer. It doesn’t rust. And it handles tough foods like carrots and nuts.
Some attachments use plastic. These work for softer tasks. The dough blade often has plastic edges. This prevents overworking your dough.
The blade spins at high speed. The motor sits at the bottom of your food processor. It turns a central shaft. Your blade clicks onto this shaft. Then it rotates when you turn the machine on.
Different blades sit at different heights. Chopping blades sit low in the bowl. Slicing discs fit at the top. This position affects how food moves through the processor.
Now let’s look at each blade type.
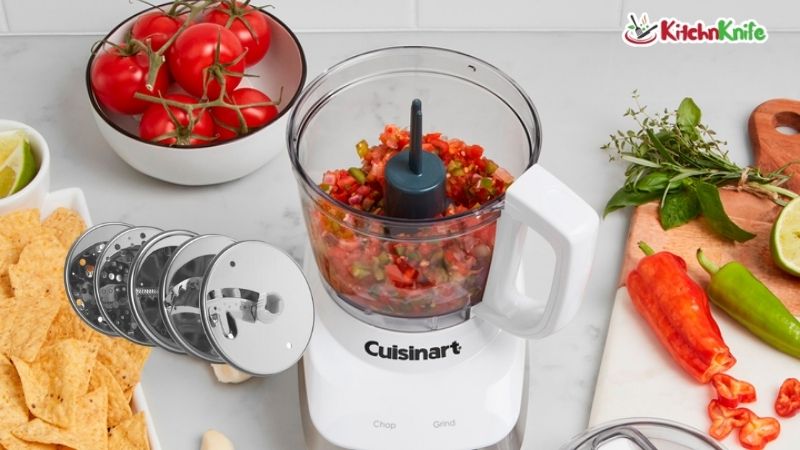
The S-Blade: Your Main Chopping Tool
The S-blade is your most important attachment. It looks like the letter “S” when you view it from the side. This blade came with your food processor. You use it more than any other blade.
What the S-Blade Does
This blade chops, minces, and purees food. It has two curved blades. They sweep through your ingredients as they spin. The curves lift food up and down. This creates an even chop.
The S-blade works in short bursts. You press the pulse button. The blade spins quickly, then stops. This gives you control. You can make coarse chops or fine minces.
Best Uses for the S-Blade
Use this blade for:
- Chopping onions, garlic, and herbs
- Making breadcrumbs from stale bread
- Grinding nuts into flour or butter
- Pureeing soups and baby food
- Making pesto, hummus, and dips
- Chopping vegetables for salsa
- Mincing meat for burgers or meatballs
Foods That Work Well
The S-blade handles both soft and hard foods. It chops raw vegetables easily. It grinds hard cheese like Parmesan. It turns cooked chickpeas into smooth hummus.
Leafy herbs work great with this blade. Basil, parsley, and cilantro chop evenly in seconds. Just make sure the herbs are dry. Wet herbs turn into paste.
Hard vegetables need a sharp S-blade. Carrots, celery, and broccoli stems all chop well. Cut them into chunks first. This helps the blade work faster.
Common Mistakes to Avoid
Don’t overfill the bowl. Food needs room to move. Fill the bowl only halfway for best results. If you need more, work in batches.
Don’t over-process. Check your food after each pulse. Once it reaches the size you want, stop. Extra pulses turn your chop into mush.
Don’t process hot liquids right away. Let soup cool for 10 minutes first. Hot liquid can leak from the bowl. It might even crack the plastic.
Cut large items into chunks. If you put a whole onion in the processor, the outside minces while the center stays large. Quarter the onion first for even results.
The Slicing Disc: Perfect Even Cuts
The slicing disc sits at the top of your food processor bowl. It has a single sharp blade. This blade sticks out from a flat disc. As food pushes against the blade, it creates thin, even slices.
How the Slicing Disc Works
You load food through the feed tube. The tube is the opening at the top of the lid. Gravity pulls food down toward the spinning disc. The blade catches the food and slices it.
The disc turns very fast. Each rotation makes one slice. The slices fall into the bowl below. Within seconds, you have a pile of perfectly cut vegetables.
Most food processors come with one slicing disc. Some models include multiple thickness options. Thin slices work for chips. Thick slices suit stir-fries.
Thickness Options Available
Slicing discs come in different sizes:
- Extra thin (1mm): potato chips, cucumber ribbons
- Thin (2mm): salads, sandwiches, garnishes
- Medium (4mm): stir-fries, gratins, general use
- Thick (6mm): hearty soups, roasted vegetables
Many food processors include a 4mm disc. This handles most tasks. You can buy other thicknesses separately. Check that they fit your processor model.
Some advanced models have adjustable slicing discs. You turn a dial to change thickness. This saves storage space. It also costs more than single-thickness discs.
Best Foods for Slicing
The slicing disc excels with firm vegetables and fruits:
- Potatoes for gratins or chips
- Cucumbers for salads
- Carrots for slaws
- Apples for pies or tarts
- Cabbage for coleslaw
- Onions for caramelizing
- Zucchini for lasagna
- Beets for salads
Softer foods work too, but they need special care. Tomatoes slice better when slightly firm. Cheese slices well when cold. Room temperature cheese gets mushy.
Tips for Even Slices
Use the food pusher. This plastic tool came with your processor. It fits inside the feed tube. It pushes food down safely. Never use your fingers.
Pack the feed tube properly. Stand vegetables upright for round slices. Lay them sideways for longer slices. Pack them snugly so they don’t tip over.
Apply steady, gentle pressure. Don’t force food down. Let the blade do the work. Heavy pressure can jam the disc or create uneven slices.
Cut food to fit the feed tube. Most tubes are about 3 inches wide. Slice large potatoes in half lengthwise. This gives you the right size for the tube.
The Shredding Disc: For Fine or Coarse Pieces
The shredding disc looks similar to the slicing disc. But instead of one blade, it has many small teeth. These teeth tear food into thin strips. The result is shredded pieces, not slices.
How Shredding Differs from Slicing
Slicing makes flat pieces. Shredding makes strips or thin strands. Think about the difference between sliced cheese and shredded cheese. Sliced cheese is smooth and even. Shredded cheese has irregular edges.
The shredding disc tears rather than cuts. This creates texture. The torn edges help shredded cheese melt faster. They help vegetables mix better into recipes.
Fine vs. Coarse Shredding Options
Most food processors include two shredding discs:
Fine shredding disc:
- Small holes (2-3mm)
- Creates thin, delicate shreds
- Best for cheese, coconut, chocolate
- Good for baking and melting
Coarse shredding disc:
- Larger holes (4-5mm)
- Makes thicker, heartier shreds
- Best for cabbage, carrots, potatoes
- Good for slaws, hash browns, salads
Some premium models include a medium shred option. This sits between fine and coarse. It’s a good all-purpose choice.
Best Uses for Each Type
Use the fine shredding disc for:
- Mozzarella or cheddar for pizza
- Hard cheese like Parmesan
- Chocolate for baking
- Coconut for desserts
- Ginger for Asian dishes
Use the coarse shredding disc for:
- Cabbage for coleslaw
- Carrots for carrot cake
- Potatoes for hash browns
- Zucchini for fritters
- Cheese for tacos or nachos
Storage and Cleaning Tips
These discs have sharp teeth. Handle them carefully. Hold them by the edges, not the center.
Rinse the disc right after use. Food dries quickly in the small holes. Dried cheese is especially hard to remove. Use a small brush to clean between the teeth.
Store shredding discs in their original sleeve if possible. Or wrap them in a towel. This protects the teeth and protects your hands when you reach into the drawer.
Never put the disc away wet. Water spots can turn into rust spots over time. Dry the disc completely with a towel.
The Dough Blade: For Perfect Pastries and Breads
The dough blade looks different from other attachments. It has short, blunt arms. These arms are usually made of plastic. The blade is thicker and moves more slowly through ingredients.
Why the Dough Blade Is Different
Dough needs gentle handling. The S-blade chops too aggressively. Its sharp edges cut through dough. This can overwork the gluten. Overworked dough becomes tough and chewy.
The dough blade has rounded edges. It pushes and folds rather than chops. This mimics hand kneading. The result is tender, flaky pastry or soft, elastic bread dough.
The plastic construction prevents overheating. Metal blades create friction. This friction generates heat. Heat can melt butter in pastry dough. It can kill yeast in bread dough. Plastic stays cooler.
Unique Design Features
Most dough blades have two short arms. Some have four. The arms are wider than S-blade arms. They push more dough with each rotation.
The blade sits lower in the bowl. This helps it reach all the dough. Nothing gets stuck in corners.
Some dough blades have one tall arm and one short arm. This creates an uneven mix. The uneven motion prevents the dough from spinning as one lump. It ensures even mixing.
Types of Dough It Handles Best
Use the dough blade for:
- Pie crust and tart dough
- Cookie dough
- Bread dough (white, whole wheat, rolls)
- Pizza dough
- Biscuit dough
- Pasta dough
- Shortbread dough
The blade works best with firm dough. Very wet, sticky dough sometimes clumps onto the blade. Very dry, crumbly dough may not come together fully.
Mixing Tips for Perfect Results
Start with dry ingredients. Put flour, salt, and sugar in the bowl first. Pulse a few times to mix them.
Add cold butter in chunks. For pastry dough, use cold butter straight from the fridge. Pulse until the mixture looks like coarse crumbs.
Add liquid slowly. Turn the processor on. Pour water or milk through the feed tube while the blade spins. Stop as soon as the dough starts to clump together.
Don’t over-mix. Dough should look slightly crumbly when you stop the processor. It will come together when you press it with your hands. If you mix until it forms a ball, you’ve gone too far.
Let the processor do the work. For bread dough, process for about 45 seconds after all ingredients are added. This kneads the dough. You’ll see it become smooth and elastic.
Specialty Blades and Discs: Beyond the Basics
Many food processor brands sell additional attachments. These specialty blades handle specific tasks. You don’t need all of them. But some might match your cooking style perfectly.
Julienne Disc
This disc cuts food into thin matchsticks. It looks like the shredding disc but has different teeth. The teeth are shaped to create long, uniform strips.
Use the julienne disc for:
- Carrots for stir-fries
- Potatoes for thin french fries
- Zucchini for salads
- Bell peppers for fajitas
- Apples for coleslaw
The julienne cut looks professional. It cooks faster than chunks because of the increased surface area. It’s perfect for quick-cooking methods like sautéing.
French Fry Disc
This attachment creates thick-cut strips. They’re thicker than julienne but thinner than hand-cut fries. The disc has larger openings than the julienne disc.
You can make:
- Classic french fries
- Steak fries
- Sweet potato fries
- Vegetable sticks for roasting
- Thick-cut potato chips
This disc saves time when you’re making fries for a crowd. One potato becomes perfect fries in seconds.
Grating Disc Options
Grating discs differ from shredding discs. They have smaller, sharper teeth. They create a finer texture. Think of the difference between shredded cheese and grated Parmesan.
Fine grating discs work for:
- Hard cheeses like Parmesan or pecorino
- Nutmeg and cinnamon sticks
- Ginger and garlic
- Lemon or orange zest
- Chocolate for dusting
The fine texture melts quickly. It distributes flavor evenly through dishes. It’s perfect for garnishing.
Citrus Juicer Attachments
Some food processors include a juicer attachment. It has a ridged cone shape. You press citrus fruit onto the cone while the processor runs.
This attachment juices:
- Lemons and limes
- Oranges and grapefruits
- Small citrus fruits
The juicer separates seeds and pulp. You get fresh juice in seconds. It’s faster than a handheld juicer for large quantities.
Whipping Disc
This rare attachment has wire whips instead of blades. It beats air into ingredients. Some high-end processors include it.
Use the whipping disc for:
- Whipping cream
- Beating egg whites
- Making light batters
- Mixing light cake batters
Most people don’t need this attachment. A stand mixer or hand mixer works better for these tasks. But if your processor includes it, you can use it for quick whipping jobs.
How to Match Blades to Your Cooking Style
Everyone cooks differently. Some people make fresh bread every week. Others focus on quick weeknight meals. Your blade collection should match what you actually cook.
For Daily Meal Prep
You need the basics: the S-blade and both shredding discs. These handle everyday cooking tasks.
The S-blade chops vegetables for stir-fries. It makes quick marinades and salad dressings. It chops nuts for topping oatmeal or yogurt.
The coarse shredding disc makes cabbage for tacos. It shreds cheese for quesadillas. It grates carrots for a quick side salad.
The fine shredding disc handles cheese for pasta or pizza. It shreds zucchini for fritters or muffins.
With these three attachments, you can prep most weeknight dinners in minutes.
For Baking Enthusiasts
Add the dough blade to your collection. This makes pastry and bread preparation much faster.
You can make pie dough in 30 seconds. Cookie dough comes together in a minute. Bread dough mixes and kneads in under two minutes.
The S-blade still helps with baking. It chops nuts for cookies. It makes graham cracker crumbs for crusts. It grinds oats into oat flour.
Consider a fine grating disc too. It grates chocolate for decorating. It zests citrus for cakes and frostings. It grates cold butter for biscuits.
For Salad Lovers
Invest in the slicing disc and julienne disc. These create restaurant-quality salads at home.
The slicing disc cuts cucumbers paper-thin. It slices radishes evenly. It makes uniform onion rings. Every piece in your salad is the same size.
The julienne disc creates matchstick vegetables. These add crunch and visual appeal. They mix easily with dressing.
Use the coarse shredding disc for cabbage-based slaws. The S-blade makes creamy dressings and vinaigrettes in seconds.
For Cheese and Vegetable Processing
If you buy blocks of cheese, you need both shredding discs. Block cheese costs less than pre-shredded. You can shred exactly what you need.
The fine disc handles mozzarella and cheddar. The coarse disc works for cheese blends and Mexican cheese.
The slicing disc cuts cheese for sandwiches and cheese boards. Cold cheese slices cleanly without crumbling.
For vegetable lovers, add the julienne disc and multiple slicing thickness options. This lets you prep vegetables for any recipe.
Blade Safety and Maintenance
Food processor blades are extremely sharp. They need careful handling. Proper care keeps them sharp longer. It also keeps you safe.
Safe Handling Practices
Always hold blades by their plastic center hub. Never touch the sharp edges. The center is designed to be a safe grip point.
When washing blades, put them in soapy water one at a time. Don’t pile them in the sink. You might forget they’re there and reach in blindly.
Store blades separately from other kitchen tools. Use the storage case that came with your processor. Or wrap each blade in a towel. This protects both the blade and your fingers.
Show family members where blades are stored. Make sure everyone knows these tools are sharp. Keep them away from young children.
When loading or unloading a blade, turn off the processor first. Unplug it if possible. The blade can start spinning if someone accidentally bumps the power button.
Proper Cleaning Methods
Rinse blades immediately after use. Food hardens quickly. Hardened food is difficult to remove from crevices.
Wash blades by hand when possible. Dishwashers are safe for most blades, but hand washing is gentler. It keeps blades sharper longer.
Use a brush for stuck-on food. A small bottle brush works well. Scrub gently to avoid dulling the edge.
Pay attention to the center hole. Food particles hide here. Clean this area thoroughly to prevent bacterial growth.
Dry blades immediately. Water spots can cause rust. Use a clean towel to dry every surface.
For stubborn residue, soak the blade in warm soapy water. Add a drop of dish soap to the water. Let it sit for 10 minutes, then wash as normal.
Storage Solutions
The original storage case is ideal. It holds blades securely. It protects sharp edges. It keeps everything organized.
If you don’t have the case, try these options:
- Stand blades upright in a drawer divider
- Store each blade in a plastic sleeve
- Use a magnetic knife strip mounted inside a cabinet
- Keep blades in individual labeled bags
Never store blades loose in a drawer. They bang against other tools. This dulls the edges. It also creates a safety hazard.
Keep frequently used blades toward the front of storage. Store specialty blades in the back. This reduces handling of rarely used items.
When to Replace Blades
Most food processor blades last for years. But eventually, they need replacement. Watch for these signs:
The blade doesn’t cut well anymore. If you need extra pulses to chop onions, the blade might be dull. If slices are uneven, the disc might be worn.
You see chips or cracks in the blade. Damaged blades don’t work properly. They can also break during use, creating a safety issue.
The blade wobbles on the shaft. A loose blade won’t process food evenly. The center fitting might be worn out.
Rust appears on the blade. Surface rust can sometimes be scrubbed off. But deep rust means the blade needs replacement.
Contact your food processor’s manufacturer about replacement blades. Most companies sell individual attachments. You don’t need to buy a whole new processor.
Shopping Guide: What to Look For
Not all food processor blades are equal. Quality varies between brands and models. These tips help you choose the best blades for your needs.
Blade Quality Indicators
Look for stainless steel construction. High-quality stainless steel stays sharp longer. It resists rust and staining. The steel should feel solid and heavy.
Check the blade’s sharpness. Good blades come very sharp from the factory. Run your finger lightly along the plastic hub near the blade. You should feel the sharpness without touching the edge.
Examine the center hub. This plastic piece should fit snugly. It shouldn’t wiggle or feel loose. A secure hub means the blade will stay balanced during use.
Look at the blade’s finish. Quality blades have smooth, polished surfaces. Rough spots or grinding marks indicate cheaper manufacturing.
Test the blade’s flexibility. Blades shouldn’t bend easily. Hold the hub and try to flex the blade gently. It should feel rigid and strong.
Compatibility with Your Processor Model
Always check compatibility before buying. Not all blades fit all food processors. The center shaft size varies between brands.
Cuisinart blades fit Cuisinart processors. KitchenAid blades fit KitchenAid models. Mixing brands usually doesn’t work.
Check your processor’s model number. This number is usually on the bottom of the base or inside the lid. Write it down before shopping.
Look for this model number on the blade package. Most packages list compatible models. Read this carefully before purchasing.
Some retailers have compatibility checkers on their websites. Enter your processor model to see which blades fit.
Universal vs. Brand-Specific Blades
Most blades are brand-specific. They’re designed for one manufacturer’s processors. These blades fit perfectly and work reliably.
Some companies make “universal” blades. These claim to fit multiple brands. Quality varies widely with universal blades.
Benefits of universal blades:
- Often cost less than brand-name options
- Can replace hard-to-find attachments
- Good for older, discontinued models
Drawbacks of universal blades:
- May not fit as snugly
- Quality can be inconsistent
- Might void your warranty
Stick with brand-specific blades when possible. They’re engineered for your exact processor. The fit is better. The performance is more reliable.
Price vs. Value Considerations
Blade prices range from $10 to $50 each. The S-blade typically costs more than specialty discs.
Expensive doesn’t always mean better. But extremely cheap blades often have problems. They dull quickly. They don’t fit properly. They might break during use.
A good S-blade costs $20 to $35. This is a worthwhile investment. You’ll use this blade constantly. A quality blade lasts for years.
Slicing and shredding discs cost $15 to $25 each. These prices are reasonable for attachments you’ll use regularly.
Specialty blades cost $15 to $30. Only buy specialty attachments you’ll actually use. That julienne disc isn’t a good value if it sits unused.
Look for blade sets on sale. Some manufacturers sell multi-blade packs at a discount. This saves money if you need several attachments.
Consider the cost of replacement blades before buying a food processor. Some brands charge premium prices for blades. Factor this into your initial purchase decision.