Last Updated on May 23, 2025 by Susanna Zuyeva
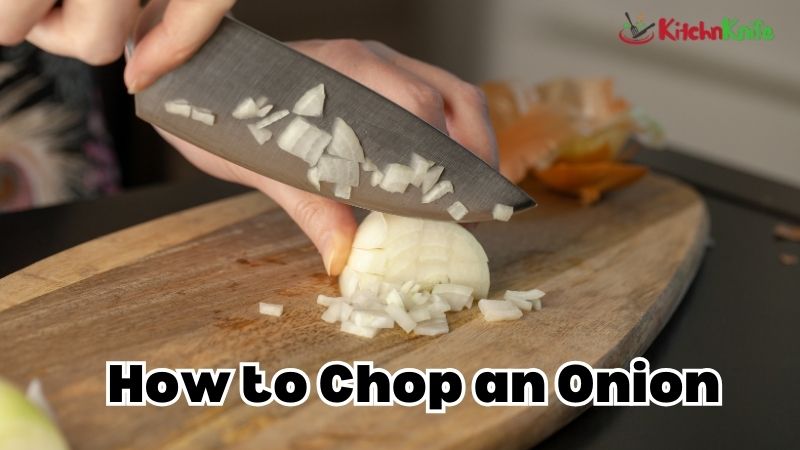
How to Chop an Onion: Easy Step by Step Guide
Introduction
Chopping an onion seems simple. But many home cooks struggle with this basic skill. Poor technique leads to uneven pieces. It also causes unnecessary tears and wasted onion.
This guide will teach you the proper way to chop an onion. You’ll learn safe knife techniques. You’ll also discover tricks to minimize tears. By the end, you’ll chop onions like a pro chef.
Good onion chopping skills matter more than you think. Even cuts cook at the same rate. This gives you better flavor in your dishes. Plus, uniform pieces look more professional.
Tools You Need
Essential Equipment
You need just a few basic tools for chopping an onion:
Sharp chef’s knife – This is your most important tool. A dull knife is dangerous and makes the job harder. An 8-inch chef’s knife works best for most people.
Stable cutting board – Choose wood or plastic. Make sure it won’t slide around. A damp towel under the board helps it stay put.
Clean kitchen towel – Keep this nearby to wipe your knife and hands.
Optional Tear-Prevention Tools
These items can help reduce tears while chopping:
- Chilled onion – Store in the fridge for 30 minutes before cutting
- Sharp knife – Reduces cell damage that causes tears
- Good ventilation – Open windows or turn on a fan
- Swimming goggles – Looks silly but works great
Preparing Your Onion
Choosing the Right Onion
Different onions work better for different cuts:
Yellow onions are best for most cooking. They have strong flavor and hold their shape well.
White onions are sharper and work great for Mexican dishes.
Red onions are mild when raw. They’re perfect for salads and sandwiches.
Sweet onions like Vidalia are gentle. They’re ideal for beginners who want less tears.
Understanding Onion Structure
An onion has natural lines that run from root to stem. These are called the grain. Cutting with the grain gives you longer pieces. Cutting against the grain gives you shorter pieces.
The root end holds the onion together. Always leave this intact until your final cuts. This keeps the onion stable while you work.
Step-by-Step Chopping Process
Step 1: Remove the Papery Skin
Start with a whole onion. Peel away the dry, papery outer layers. Remove any brown or damaged parts. Stop when you reach the first clean, firm layer.
Don’t remove too much. You’ll waste good onion. Just take off what’s dry or damaged.
Step 2: Cut Off the Top
Place the onion on your cutting board. The stem end should point up. This end usually has dried green bits or a small tail.
Make a straight cut about half an inch from the top. Remove this piece and throw it away. Now you have a flat surface to work with.
Step 3: Keep the Root End Intact
The root end is the opposite from where you just cut. It looks hairy or fuzzy. Do not cut this off yet. This end holds the onion layers together.
Keeping the root intact prevents the onion from falling apart. This makes your cuts much easier and safer.
Step 4: Cut the Onion in Half
Turn the onion so the cut end faces down. The root end should point up. Place your knife on top of the onion. Line it up to cut from the root end straight down through the center.
Press down firmly and cut through the entire onion. You now have two half-moon pieces. Each piece has a flat side and a curved side.
Step 5: Peel Each Half
Take one half and lay it flat side down. This makes it stable. Peel away any remaining papery skin. Start at the top where you made your first cut. The skin should come off easily.
Repeat with the other half. Now both pieces are clean and ready for chopping.
Step 6: Make Horizontal Cuts
Take one onion half. Keep the flat side down for stability. Hold the onion firmly with your non-cutting hand. Curve your fingers like a claw. Keep your knuckles forward.
Make horizontal cuts parallel to the cutting board. Start about half an inch from the root end. Make 2-3 cuts depending on the onion size. Do not cut all the way through the root end.
These cuts break up the onion layers. This helps create uniform pieces in your final dice.
Step 7: Make Vertical Cuts
Now make vertical cuts from top to bottom. Start at the stem end where you made your first cut. Cut down toward the root end. Make cuts about quarter-inch apart for small dice. Make them half-inch apart for larger pieces.
Keep the root end intact. This still holds everything together. Your cuts should stop just before the root.
Step 8: Final Dicing Cuts
Now comes the final step. Turn your knife so it’s perpendicular to your vertical cuts. Start at the stem end. Make cuts straight across the onion. Work your way toward the root end.
This creates your final dice. The pieces should fall away as you cut. When you reach the root end, you can discard it or save it for stock.
Step 9: Repeat with Second Half
Follow the same process with your second onion half. You’ll get faster with practice. Soon this whole process will take just a minute or two.
Different Types of Cuts
Fine Dice (Brunoise)
Make your cuts very close together. About eighth-inch spacing works well. This creates tiny, uniform pieces. Use fine dice for sauces or when you want onion flavor without big chunks.
Medium Dice
Space your cuts about quarter-inch apart. This is the most common cut for home cooking. It works well for soups, stews, and most recipes.
Large Dice
Make cuts about half-inch apart. Use this for rustic dishes or when you want visible onion pieces. It’s also good for beginners who are still learning.
Slices
For onion rings or fajitas, you want slices instead of dice. Skip the horizontal cuts. Just make vertical cuts from top to bottom. Then separate the natural rings.
Pro Tips for Better Results
Preventing Tears
Chill your onion – Cold onions release fewer tear-causing compounds. Put the onion in the fridge for 30 minutes before cutting.
Use a sharp knife – Sharp blades cut cleanly through cells. This releases fewer irritating gases.
Work quickly – The longer you take, the more gases build up. Practice makes you faster.
Breathe through your mouth – This reduces how much gas reaches your nose and eyes.
Getting Uniform Cuts
Keep your cuts parallel – Line up each cut with the previous one. This takes practice but makes a big difference.
Use consistent pressure – Press down the same amount for each cut. This keeps your pieces the same size.
Take your time – Speed comes with practice. Focus on technique first.
Safety Tips
Keep fingers curved – Make a claw shape with your holding hand. Keep knuckles forward to guide the knife.
Cut away from your body – Never cut toward yourself or your fingers.
Keep your knife sharp – Dull knives are more dangerous than sharp ones. They require more pressure and can slip.
Clean up spills – Onion juice makes surfaces slippery. Wipe up any moisture right away.
Common Mistakes to Avoid
Using a Dull Knife
This is the biggest mistake people make. A dull knife crushes onion cells instead of cutting them cleanly. This releases more tear-causing gases. It also makes uneven cuts and increases injury risk.
Sharpen your knife regularly. A sharp knife makes the job easier and safer.
Cutting the Root Too Early
Many people cut off both ends of the onion first. Don’t do this. The root end holds the layers together. Cut it too early and your onion falls apart.
Keep the root intact until your very last cuts. This makes the whole process much easier.
Making Cuts Too Big
Large, uneven pieces cook at different rates. Some parts get mushy while others stay raw. Take time to make consistent cuts. Your cooking will improve dramatically.
Rushing the Process
Good knife skills take practice. Don’t try to go fast when you’re learning. Focus on proper technique first. Speed will come naturally with practice.
Poor Hand Position
Wrong hand position causes accidents. Keep your holding hand in a claw shape. Your knuckles should face forward to guide the knife. Never extend your fingers past your knuckles.
Storage and Usage Tips
Storing Cut Onions
Cut onions don’t last as long as whole ones. Store them in the refrigerator in a sealed container. Use within 2-3 days for best quality.
Cut onions can make other foods taste like onion. Keep them well-sealed to prevent odor transfer.
Using Different Cuts
Fine dice works best for sauces, dressings, and dishes where you want onion flavor without texture.
Medium dice is perfect for most cooking. Use it for soups, stews, stir-fries, and casseroles.
Large dice works well for rustic dishes, roasting, and when you want visible onion pieces.
Slices are ideal for onion rings, fajitas, sandwiches, and salads.
Frequently Asked Questions
Why do onions make me cry?
Onions contain sulfur compounds. When you cut them, these compounds mix with enzymes. This creates a gas that irritates your eyes. Your eyes make tears to wash away the irritation.
Using a sharp knife and chilling the onion helps reduce this reaction.
Can I chop onions ahead of time?
Yes, but they’re best used fresh. Cut onions lose flavor and develop a sharper taste over time. Store them in the refrigerator and use within 2-3 days.
For meal prep, cut onions the day you plan to cook them if possible.
What’s the best knife for chopping onions?
An 8-inch chef’s knife works best for most people. It’s large enough to handle big onions but not too heavy. Make sure it’s sharp – this is more important than the brand or price.
How do I know if my knife is sharp enough?
A sharp knife should easily slice through paper without tearing it. It should also cut through an onion with very little pressure. If you’re pressing hard or the onion is getting crushed, your knife needs sharpening.
Should I wash the onion before cutting?
You can rinse the outside to remove dirt, but it’s not necessary. You’ll be removing the outer layers anyway. Just make sure your cutting board and knife are clean.
Can I use a food processor instead?
A food processor works for some dishes, but it won’t give you the same control. Hand-chopping lets you choose the exact size and shape. It also doesn’t crush the onion like a processor might.
Food processors work well for large batches or when you need very fine pieces.
How long should it take to chop an onion?
Beginners might take 5-10 minutes. With practice, you can chop an onion in 1-2 minutes. Don’t worry about speed when you’re learning. Focus on safety and technique first.
What should I do with the onion scraps?
Save the root ends and outer skins for vegetable stock. They add great flavor. Store them in the freezer until you have enough scraps to make stock.
You can also compost onion scraps if you don’t make stock.
Conclusion
Learning to chop an onion properly is a fundamental cooking skill. It takes practice, but the steps are simple. Start with a sharp knife and stable cutting board. Keep the root end intact while you work. Make horizontal cuts, then vertical cuts, then final cross cuts.
Remember to prioritize safety over speed. Keep your fingers in a claw position. Use consistent cuts for even cooking. With practice, you’ll chop onions quickly and safely.
Good onion chopping skills will improve all your cooking. Even cuts cook evenly. This gives you better flavor and texture in every dish. Take time to master this basic technique. Your future self will thank you every time you cook.
Practice these steps with different onion types. Try various cut sizes for different recipes. Soon you’ll be chopping onions like a professional chef. The key is consistent practice and proper technique.