Last Updated on December 15, 2025 by Kathay Lee
Why Your Garlic Press Isn’t Working (And How to Fix It)
Do you struggle with your garlic press? Does garlic get stuck in the holes? Do you end up with a mess instead of perfect minced garlic cloves?
You’re not alone. Many home cooks give up on their garlic presser and go back to chopping by hand. But here’s the truth: when you know how to use a garlic press properly, it saves time and gives you better results.
A good garlic press turns whole cloves into fine, even pieces in seconds. No cutting board needed. No knife skills required. Just pure, aromatic chopped garlic ready for your recipe.
In this guide, you’ll learn the exact steps to use your press like a pro. We’ll cover prep work, proper technique, and cleaning tips that most people miss.
What Makes a Good Garlic Press
Before we dive into technique, let’s talk about tools. Not all presses are created equal.
The best garlic mincer has a few key features:
Strong construction matters. Look for stainless steel or other sturdy materials. Cheap plastic presses break easily and don’t apply enough force to mince garlic cloves properly.
Hole size and pattern affect results. Smaller holes create finer minced garlic. Larger holes work faster but give you chunkier pieces. Most quality presses use a pattern that balances both.
Handle design impacts comfort. Long handles with good grip reduce hand strain. This matters if you cook with garlic often.
You’ll find two main types in stores and on sites like Alibaba:
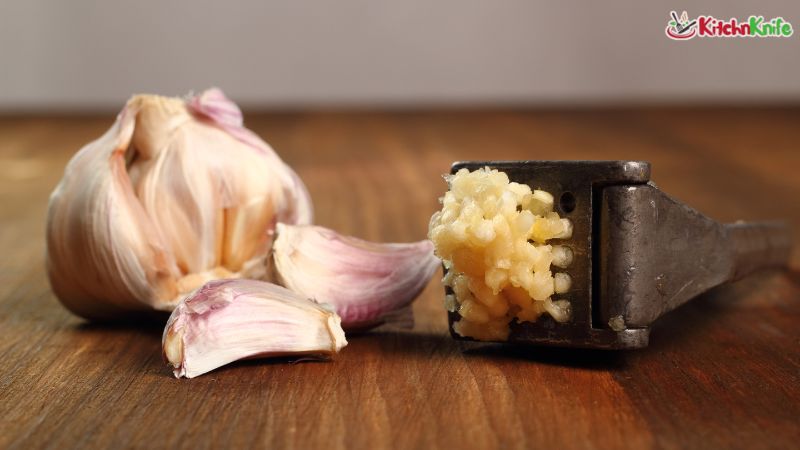
Standard presses have a chamber where you place the clove. You squeeze two handles together, pushing garlic through small holes.
Garlic rocker presses roll back and forth over cloves. These work differently but achieve similar results.
Both styles work well when used correctly. Pick the one that feels comfortable in your hand.
Getting Your Garlic Ready
This step determines your success. Proper prep makes everything easier.
Do You Need to Peel Garlic First?
Here’s good news: most modern presses work with unpeeled cloves. The skin stays in the chamber while the garlic flesh pushes through.
But peeling still helps in some cases:
- Peeled cloves process faster. Less waste stays stuck in the press.
- You get more garlic per clove. Nothing trapped with the skin.
- Cleaning becomes easier. No papery bits to remove later.
A simple garlic peeler makes this quick. These are silicone tubes. You put a clove inside, roll it on the counter, and the peel comes right off. It takes five seconds.
Choosing the Right Cloves
Size matters. Pick medium-sized cloves for best results. Very large cloves may not fit in your press chamber. Tiny ones don’t yield much.
Freshness counts. Firm cloves work better than soft, old ones. Fresh garlic has more moisture and pushes through holes more easily.
One or two at a time works best. Don’t overload your press. Most models handle one large clove or two small ones per squeeze.
How to Use a Garlic Press: Step by Step
Now for the main technique. Follow these steps for perfect results every time you want to mince garlic cloves.
Step 1: Position Your Garlic
Open your press fully. Place one peeled or unpeeled clove in the chamber. The clove should sit flat, not at an angle.
For unpeeled garlic, position it so the root end (where it attached to the bulb) faces the holes. This gives you the best yield.
Step 2: Get Your Grip Right
Hold the press over your bowl or pan. Place one handle in your palm. Wrap your fingers around both handles.
Your palm should rest against the handle, not your fingers alone. This lets you use your whole hand’s strength.
Step 3: Apply Steady Pressure
Squeeze the handles together with firm, even pressure. Don’t jerk or pump. One smooth, continuous squeeze works best.
You’ll feel resistance as the garlic starts pushing through. Keep squeezing until the handles nearly touch. This gets every bit of garlic out.
Step 4: Check Your Results
Good technique produces fine, evenly minced garlic. The pieces should be uniform in size. If you see big chunks mixed with tiny bits, your pressure was uneven.
Open the press. Remove any peel or leftover bits from the chamber. If you need more, add another clove and repeat.
Step 5: Get the Last Bits
Don’t waste garlic stuck on the outside of the press. Use the back of a knife or spoon to scrape it into your dish. This garlic is already minced and ready to use.
Using a Garlic Rocker Style Press
These work differently than standard presses. Here’s the proper technique:
Place peeled cloves on your cutting board. Put the rocker press on top. Rock it back and forth while applying downward pressure.
The curved steel garlic surface rolls over the cloves, crushing and mincing them through the holes on the bottom.
Key tips for rockers:
- Use a bit of pressure. Don’t just roll it lightly.
- Rock 4-5 times per clove. This ensures even mincing.
- Scrape between uses. Clean garlic off the bottom before doing more cloves.
Common Mistakes That Ruin Results
Even with the right press, these errors cause problems:
Mistake 1: Overfilling the chamber. Trying to press three cloves at once doesn’t save time. It just makes a mess and wastes garlic.
Mistake 2: Using weak pressure. Timid squeezing leaves chunks. Your press needs firm, decisive pressure to mince properly.
Mistake 3: Not cleaning immediately. Dried garlic becomes cement-like. It’s ten times harder to clean an hour later.
Mistake 4: Forcing very hard garlic through. Old, dried-out cloves don’t press well. They just get stuck. Use fresh garlic for best results.
Mistake 5: Ignoring the reverse function. Many presses have a built-in cleaner on the handle. This pops garlic bits out of holes. Use it right after pressing.
How to Clean Your Garlic Press (The Easy Way)
Cleaning defeats many people. Garlic gets wedged in those tiny holes and seems impossible to remove.
Here’s the secret: clean it within 60 seconds of using it.
Immediate Cleaning Method
Step 1: Hold the press under running water immediately after use. Hot water works better than cold.
Step 2: Use the built-in cleaning tool (if your press has one) to push garlic bits out from the back side.
Step 3: Rub the holes with your thumb or a small brush. A toothbrush works great.
Step 4: Shake off excess water. Done.
This takes 30 seconds and prevents all the hard scrubbing later.
When Garlic Gets Stuck
If you forgot to clean right away, try this:
Soak the press in warm, soapy water for 5 minutes. The water softens dried garlic. Then use a brush or the cleaning tool.
For really stuck garlic, use a toothpick to clear individual holes.
Dishwasher or Hand Wash?
Most stainless steel garlic presses are dishwasher safe. Check your model’s instructions.
But hand washing is faster and more effective. The dishwasher doesn’t always clear all the holes.
Getting the Most from Your Best Garlic Mincer
A quality press lasts years with proper care. Here’s how to extend its life:
Dry it completely after washing. Don’t leave it wet in a drawer. This prevents rust on metal parts and mildew on any plastic components.
Store it with handles open. Keeping it closed puts constant pressure on the spring mechanism. This wears it out faster.
Oil the hinge occasionally. A drop of food-grade mineral oil keeps the mechanism smooth. Do this every few months if you cook with garlic often.
Replace when needed. If handles crack, holes widen, or the mechanism fails, get a new press. A worn-out tool frustrates you and wastes garlic.
Troubleshooting: When Things Go Wrong
Problem: Garlic squirts out the sides instead of through holes.
Solution: You’re using too much garlic at once or your clove is positioned wrong. Use less per squeeze and center the clove properly.
Problem: You get mushy garlic instead of clean mince.
Solution: Your garlic is too old or watery. Use fresher cloves. Also check if your press holes are worn and enlarged.
Problem: Your hand hurts after pressing several cloves.
Solution: Your press has poor ergonomics, or you’re gripping wrong. Make sure your palm bears the pressure, not just your fingers. Consider upgrading to a press with longer handles.
Problem: Bits of peel mix with the minced garlic.
Solution: Peel garlic before pressing, or position unpeeled cloves more carefully so the root end faces the holes.
Frequently Asked Questions
Q: Is it better to mince garlic or use a press?
A press is faster and more consistent. Hand mincing with a knife works fine too, but takes longer and requires more skill. Both methods are valid. Choose based on your comfort level and available time.
Q: Should you wash garlic before using a press?
Yes, rinse cloves briefly to remove any dirt. Pat them dry before pressing. Wet garlic doesn’t press as cleanly.
Q: Can you press garlic ahead of time?
Fresh-pressed garlic tastes best when used immediately. But you can press it up to a day ahead. Store chopped garlic in a small container with a bit of olive oil in the fridge.
Q: Why does my garlic press smell even after washing?
Garlic oils soak into plastic parts and some metals. Soak the press in a mixture of baking soda and water for 20 minutes. This neutralizes odors. Stainless steel holds smells less than other materials.
Q: Do I need a garlic peeler if I have a press?
Not necessarily. Many people press unpeeled cloves successfully. But a garlic peeler costs just a few dollars and makes prep easier. It’s a nice addition if you use garlic often.
Q: What’s the difference between cheap and expensive garlic presses?
Build quality and durability. Cheap presses from random sellers on sites like Alibaba often break quickly. They use thin metal that bends and weak plastic that cracks. A good press from a known brand costs more upfront but lasts for years and works much better.
Final Tips for Perfect Pressed Garlic
You now know how to use a garlic press properly. Let’s recap the key points:
Choose a quality stainless steel press with a comfortable grip. Prepare your cloves by peeling them if you want the cleanest results. Place one or two cloves in the chamber and squeeze with firm, steady pressure. Clean your press immediately under running water.
Practice makes perfect. Your first few attempts might feel awkward. After pressing garlic for a week, the technique becomes second nature.
The right tool and proper technique turn garlic prep from a chore into a quick task. No more avoiding recipes because they need minced garlic cloves. No more buying expensive pre-chopped garlic in jars.
Your best garlic mincer is waiting to make cooking easier. Give these techniques a try tonight.