Last Updated on December 18, 2025 by Kathay Lee
Introduction: Why Use a Mortar and Pestle?
I’ve been grinding my own spices for years. The difference is night and day. Store-bought ground spices lose flavor fast. When you grind spices fresh, you unlock oils and aromas that transform your cooking.
A mortar and pestle isn’t just a tool. It’s a gateway to better meals. Let me show you exactly how to use a mortar and pestle for spices.
What Is a Mortar and Pestle?
The mortar is the bowl. The pestle is the club-shaped tool you hold. Together, they crush and grind ingredients.
People have used this tool for thousands of years. Ancient civilizations relied on it for medicine and food. Today, it remains essential in kitchens worldwide.
Types of Mortar and Pestle Sets
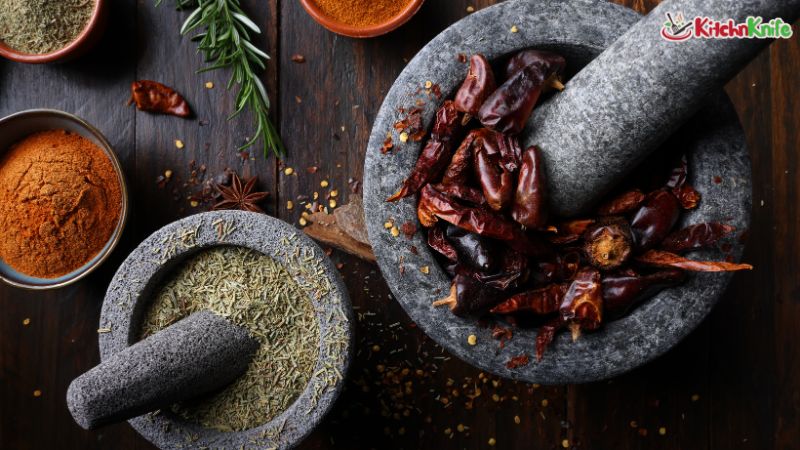
Granite Mortar
A granite mortar is my top pick. It’s heavy and durable. The rough surface grips spices well. This stone mortar won’t absorb flavors or stains.
Granite handles tough jobs. You can grind hard spices like cinnamon sticks with ease.
Marble Mortar
A marble mortar looks elegant. It works well for softer spices. The smooth surface is gentle on delicate ingredients.
However, marble can stain. Turmeric will leave yellow marks. A marble pestle pairs beautifully with the bowl for light grinding tasks.
Thai Mortar
Thai kitchens use a specific style. These clay mortars have a rough interior. They’re perfect for making curry pastes and grinding fresh herbs.
The Thai design includes a wooden pestle. This combination is ideal for wet ingredients.
Wooden Mortar
A wooden mortar is lightweight and portable. It’s best for soft herbs and light spices. Wood absorbs moisture and oils over time.
I use mine for basil and garlic. It’s not ideal for hard spices, though.
Ceramic Mortar
A ceramic mortar is smooth and attractive. It’s good for kitchens where you want style and function. The glazed interior is easy to clean.
Ceramic works for medium-hardness spices. It’s not as durable as stone options.
How to Use a Mortar and Pestle for Spices: Step-by-Step
Step 1: Choose the Right Size
Start with the best mortar for your needs. A 2-cup capacity works for most kitchens. Larger sets handle bigger batches.
Don’t overfill. Fill your mortar only one-third full. This gives spices room to move.
Step 2: Prepare Your Spices
Toast whole spices first. Heat a dry pan over medium heat. Add cumin, coriander, or fennel seeds. Toast for 2-3 minutes until fragrant.
Let spices cool completely. Hot spices release oils too fast. You’ll lose flavor.
Step 3: Add Spices to the Mortar
Place cooled spices in your mortar. Start with a small amount. You can always grind more.
For a recipe calling for 2 tablespoons of ground spice, start with 2 tablespoons of whole spices.
Step 4: Begin Grinding
Hold the mortar steady with one hand. Grip the pestle like a club with your other hand.
Press down firmly. Use a twisting motion. Push the pestle against the spices. The rough surface of a stone mortar will grip and break them down.
Step 5: Use a Pounding Motion
For harder spices, pound first. Bash cinnamon sticks or nutmeg a few times. This breaks them into smaller pieces.
Then switch to grinding. The circular motion creates a fine powder.
Step 6: Check Texture
Stop and check your progress. Scrape spices from the sides. Mix everything together.
Grind until you reach your desired texture. Some recipes need coarse spices. Others require a fine powder.
Step 7: Transfer to a Container
Use a spoon to scoop out ground spices. Or pour directly into your recipe.
Store extra ground spices in an airtight jar. Use them within a week for peak flavor.
Tips for Grinding Different Spices
Hard Spices
Cinnamon sticks, nutmeg, and cloves are tough. A granite mortar handles these best. Pound first, then grind.
Break hard spices into smaller chunks before grinding. This protects your pestle set from damage.
Soft Spices
Cumin, coriander, and cardamom pods are easier. These grind quickly. A few minutes of steady grinding gives you perfect results.
Remove cardamom seeds from their pods first. The pods are fibrous and don’t grind well.
Oily Spices
Fennel and caraway contain oils. These can make your mortar slippery. Wipe it clean between batches.
The oils are what give these spices their punch. Fresh grinding releases maximum flavor.
Blended Spice Mixes
Want to make garam masala or curry powder? Grind each spice separately first. Then combine them.
This ensures even texture. Each spice grinds at a different rate. Doing them separately gives you control.
Cleaning Your Mortar and Pestle
For Stone and Granite
Rinse with warm water. Use a stiff brush to scrub away residue. Never use soap on a stone mortar.
Soap seeps into the pores. It will flavor your next batch of spices.
For Marble and Ceramic
These materials are less porous. You can use a tiny amount of mild soap if needed. Rinse thoroughly.
Dry completely before storing. Water spots can form on marble.
For Wood
Wipe with a damp cloth. Don’t soak wooden mortars. They’ll crack or warp.
Oil your wooden mortar occasionally. This keeps the wood from drying out.
Removing Stubborn Stains
Turmeric stains are common. Make a paste with baking soda and water. Scrub gently.
For strong odors, grind uncooked rice. The rice absorbs smells. Then rinse clean.
Mortar and Pestle vs. Spice Grinder
A spice grinder is faster. It’s electric and convenient. But it has drawbacks.
Blades heat up spices. This can cook away delicate oils. The flavor changes.
A pestle set gives you control. You feel the texture. You can adjust as you go. The process connects you to your cooking.
In my kitchens, I use both. For large batches, I reach for the grinder. For special recipes, nothing beats the mortar.
Best Practices for Using Your Mortar and Pestle
Don’t Rush
Take your time. Grinding by hand is meditative. Enjoy the process. The aroma filling your kitchen is part of the reward.
Use Fresh Spices
Old whole spices won’t improve with grinding. Buy from stores with high turnover. Check expiration dates.
Grind Small Batches
Fresh is best. Grind only what you need for your recipe. Ground spices lose potency within days.
Apply Even Pressure
Consistent pressure gives consistent results. Don’t bear down too hard. Let the weight of the pestle do the work.
Keep It Dry
Moisture is the enemy. Always dry your mortar completely. Store in a dry place.
Common Mistakes to Avoid
Overfilling
This is mistake number one. Spices jump out when the mortar is too full. Stick to the one-third rule.
Using Soap on Porous Materials
Your granite or stone mortar will taste like soap forever. Trust me on this. Water and elbow grease are enough.
Grinding Everything Together
Some ingredients need more time. Others grind quickly. Separate them for best results.
Storing While Damp
Mold can grow in a damp mortar. Always air dry completely.
Ignoring Cracks
Check your mortar regularly. Cracks can harbor bacteria. Replace damaged sets.
Choosing the Best Mortar for Your Kitchen
Consider what you cook most. Do you make a lot of curry pastes? Get a Thai-style set.
Do you grind hard spices often? A heavy granite mortar is your friend.
For occasional use, a smaller ceramic mortar works fine. It won’t take up much counter space.
Weight matters. Heavier mortars stay put during grinding. Light ones slide around.
Size matters too. A 6-inch diameter is standard. It handles most tasks. Smaller sets are cute but impractical for cooking.
Using Your Mortar and Pestle Beyond Spices
This tool isn’t just for spices. I use mine for crushing garlic, making pesto, and grinding fresh herbs.
The gentle crushing preserves flavors better than a blender. Your recipe will taste more vibrant.
You can make nut butters, grind salt blends, and even crush ice for cocktails.
Frequently Asked Questions
How long does it take to grind spices?
Most soft spices take 2-3 minutes. Hard spices like cinnamon may take 5-7 minutes. The time varies based on the amount and desired fineness.
Can I use a mortar and pestle for wet ingredients?
Yes. A Thai mortar works best for wet pastes. The rough interior grips moist ingredients. Just clean it thoroughly afterward.
Do I need to season a new mortar and pestle?
Stone and granite mortars benefit from seasoning. Grind uncooked rice until it comes out clean. This removes stone dust and preps the surface.
Why does my mortar smell like old spices?
Porous materials absorb oils. Grind uncooked rice to absorb odors. Then wash with warm water. This refreshes the surface.
Can I grind coffee beans in my mortar and pestle?
You can, but coffee oils are strong. They’ll flavor everything you grind afterward. Keep a separate mortar for coffee if you go this route.
What’s the difference between grinding and pounding?
Pounding breaks ingredients into chunks. Grinding creates a fine powder. You use both techniques depending on what you’re making.
Conclusion: Elevate Your Cooking Today
Learning how to use a mortar and pestle for spices changes everything. Your dishes will taste brighter and more complex.
Start with one recipe. Grind your cumin fresh. Notice the difference. You’ll never go back to pre-ground.
The best mortar is the one you’ll actually use. Pick a material that fits your cooking style. Keep it on your counter where you’ll see it.
Your kitchens deserve better than stale spices. Take control of flavor. Grind fresh. Cook better. Taste the difference.