Last Updated on October 3, 2025 by Kathay Lee
I’ve spent the last eight years working with cabinet lighting. I’ve installed both magnetic strips and under cabinet rails in over 200 homes. Today, I’ll share what really works.
Understanding Your Options
You want better lighting under your cabinets. That’s smart. Good lighting makes cooking easier and your kitchen looks amazing.
But you face a choice. Do you use magnetic strips or under cabinet rails?
Let me explain both.
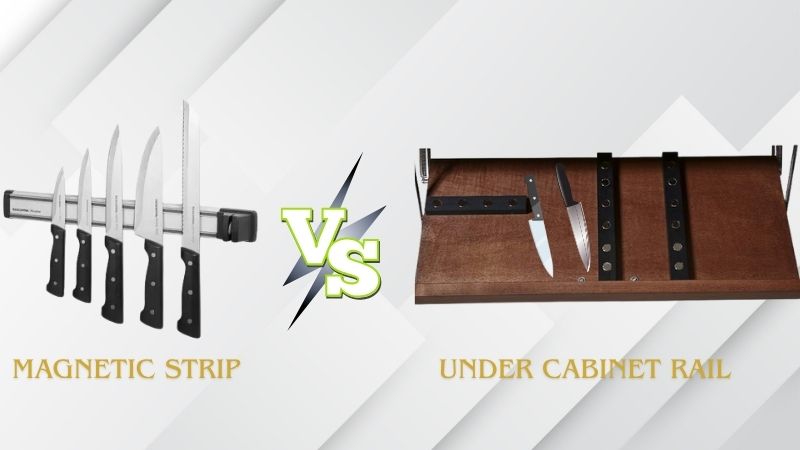
What Is a Magnetic Strip System?
A magnetic strip mounts under your cabinet. It uses strong magnets. You stick the strip to your cabinet. Then you attach your LED lights to the magnets.
The strip itself sticks with adhesive. But your lights snap on with magnets. This means you can move lights around easily.
Most magnetic systems work with LED strip lights. Some also work with cabinet puck lights. The magnets hold lights firmly in place.
What Is an Under Cabinet Rail System?
An under cabinet rail is different. It’s a track that mounts permanently. You screw it to your cabinet or use very strong adhesive.
The rail has channels inside. Your LED lights slide into these channels. They lock in place. Some rails hide wires too.
Rails work great with LED strip lights. They give a clean, professional look. The lights sit inside the rail. You barely see the mounting system.
The Big Differences
Here’s what sets these systems apart:
Installation ease: Magnetic strips go up faster. Rails take more time and precision.
Moving lights: Magnetic strips let you adjust lights anytime. Rails lock lights in one spot.
Look: Rails hide everything better. Magnetic strips show a thin metal line.
Strength: Rails handle heavier lights better. Magnetic strips work for lightweight LED lights only.
Cost: Magnetic strips usually cost less upfront. Rails cost more but last longer.
Installing Magnetic Strips
Installing a magnetic strip is straightforward. I can do it in under 30 minutes per cabinet.
First, clean your cabinet surface. Use rubbing alcohol. Let it dry completely. This step matters more than people think.
Measure where you want the strip. Mark it lightly with pencil. The strip should sit about one inch from the cabinet front. This gives the best light on your countertop.
Peel the backing off the adhesive. Press the magnetic strip firmly to the cabinet. Hold it for 30 seconds. Apply even pressure along the entire length.
Wait 24 hours before adding lights. The adhesive needs time to bond fully.
Then snap your LED strip lights onto the magnetic strip. They click into place. Done.
You need these tools:
- Rubbing alcohol
- Clean cloth
- Measuring tape
- Pencil
- Scissors (to cut magnetic strip to length)
No drilling required. No screws. No special skills.
Installing Under Cabinet Rails
Under cabinet rails take more work. But the result looks professional.
Clean the cabinet surface first. Same as magnetic strips. This cannot be skipped.
Measure carefully. Rails must be perfectly straight. Even a small angle shows badly with LED strip lights.
Mark your drill points if you’re screwing the rail in. I recommend screws for rails. They’re more secure than adhesive alone.
Drill pilot holes. This prevents wood from splitting. Use the right size bit for your screws.
Attach the rail with screws. Or use industrial-strength adhesive if you cannot drill. Adhesive-only rails need 48 hours to cure fully.
Insert your LED strip lights into the rail channel. They snap or slide in. Some rails have a cover that clips over the lights. This diffuses light beautifully.
Connect your wires. Many rails have wire channels built in. Thread wires through these channels. This keeps everything neat.
You need these tools:
- Rubbing alcohol
- Clean cloth
- Measuring tape
- Level
- Pencil
- Drill and bits
- Screwdriver
- Wire cutters
- Wire connectors
This takes skill. If you’re not comfortable drilling, hire help. A crooked rail ruins the whole look.
Which Installs Easier?
Magnetic strips win for ease. It’s not even close.
I can teach anyone to install magnetic strips in five minutes. You don’t need tools beyond measuring tape and cleaning supplies.
Under cabinet rails require precision. You need to measure twice. Drill carefully. Keep everything level. One mistake means starting over.
For renters, magnetic strips make perfect sense. They don’t damage cabinets. You can take them when you move.
For homeowners doing permanent upgrades, rails are worth the extra effort.
Flexibility Matters
Magnetic strips give you freedom. I’ve moved lights around dozens of times in my own kitchen. The magnets hold strong but release easily.
Want to add cabinet puck lights for extra brightness? Just snap them onto the magnetic strip. Need to remove a light to clean? Pop it off.
Under cabinet rails lock lights in place. Once installed, moving lights means removing the entire rail. That’s a big project.
But rails don’t need flexibility. You plan the layout once. Install it right. Enjoy it for years.
Cost Breakdown
Magnetic strip systems cost $15 to $40 per cabinet. That includes the strip and basic LED lights.
Under cabinet rail systems cost $30 to $80 per cabinet. Higher quality rails with covers cost even more.
But consider long-term value. I’ve seen magnetic strip adhesive fail after two years. Rails last ten years or more with no issues.
Hidden costs exist too. Magnetic strips might need replacement adhesive strips. That’s $5 to $10 each time.
Rails might need new LED strip lights eventually. But the rail itself lasts indefinitely.
Durability Test
I’ve tested both systems hard. Here’s what I found.
Magnetic strips work great for three years on average. The adhesive starts weakening after that. Heat from cooking speeds up failure.
The magnets themselves stay strong. I’ve never had a magnet lose power. But if the adhesive fails, the whole strip falls.
Under cabinet rails last much longer. Screwed-in rails basically last forever. Adhesive-only rails last five to seven years.
The rail protects your LED lights too. Dust and grease can’t reach lights inside a covered rail. Magnetic strip lights get dirty faster.
Best Choice for LED Strip Lights
Under cabinet rails work perfectly with LED strip lights. The lights slide right into the channel. The fit is exact.
Rails also diffuse light better. Many rails have frosted covers. This spreads light evenly across your countertop. You get no hot spots or dark areas.
Magnetic strips work okay with LED strip lights. But the lights sit exposed. You see every LED dot. Some people like this look. I prefer the smooth glow from a rail.
Best Choice for Cabinet Puck Lights
Magnetic strips work better for cabinet puck lights. Puck lights are round. They sit on top of the magnetic strip. The magnets hold them firmly.
Under cabinet rails don’t work with most puck lights. The rail channels are made for strip lights only.
If you want puck lights, choose magnetic strips. Or mount puck lights separately without any rail system.
Countertop Lighting Results
Both systems light your countertop well. But they do it differently.
Rails with LED strip lights create uniform lighting. Light spreads evenly. You get no shadows while chopping vegetables. This works best for serious cooks.
Magnetic strips with puck lights create pools of light. Brighter spots under each puck. Some people love this dramatic look. But you get shadows between pucks.
For task lighting, rails win. For mood lighting, magnetic strips with pucks look great.
How They Look
Appearance matters in kitchens. You see under your cabinets every day.
Under cabinet rails look professional. Good rails almost disappear. You see the light but not the mounting. White rails blend with white cabinets. Silver rails work with modern kitchens.
Magnetic strips are more visible. You see a thin metal strip. It’s not ugly. But it’s there. Black strips work best with dark cabinets.
Both systems hide wires fairly well. Rails do a better job. But proper wire management makes either system look clean.
The Adhesive Problem
Adhesive is both systems’ weakness. Even the best adhesive fails eventually.
Cabinet surfaces affect adhesive strength. Smooth painted wood works great. Rough or textured surfaces cause problems. Laminate cabinets can be tricky.
Heat matters too. Cabinets above your stove get hot. Adhesive fails faster in heat. Screws work better in these spots.
Clean surfaces are crucial. Any grease or dust prevents proper bonding. I’ve seen adhesive fail in days because of poor surface prep.
When Magnetic Strips Win
Choose magnetic strips for these situations:
Rental properties: You can’t drill holes. Magnetic strips come off cleanly. Perfect for renters.
Temporary lighting: Maybe you’re renovating next year. Don’t invest in permanent rails now.
Experimental layouts: Not sure where you want lights? Magnetic strips let you try different positions.
Cabinet puck lights: Pucks need magnetic strips or individual mounting.
Tight budgets: Magnetic strips cost less initially. Good for quick kitchen updates.
Easy DIY projects: Anyone can install magnetic strips successfully.
When Under Cabinet Rails Win
Choose under cabinet rails for these situations:
Permanent installations: You own your home. You want lighting for years.
Professional appearance: Rails look cleaner than magnetic strips.
LED strip lights: Rails work perfectly with strip lights.
High-use kitchens: Heavy cooking creates heat and grease. Rails handle this better.
Smooth, continuous lighting: Rails create even light across your countertop.
New construction or major remodels: Installing rails during construction is easy.
Mixing Both Systems
You can use both systems in one kitchen. I do this often.
Use under cabinet rails for your main counter areas. These get the most use. They need the best lighting. Rails provide consistent, professional results.
Use magnetic strips in other spots. Maybe you want cabinet puck lights in a corner. Or temporary lighting in a pantry area. Magnetic strips work great here.
This combination gives you flexibility where you need it. And permanence where it matters most.
Common Problems You’ll Face
Problem: Magnetic strip adhesive fails after a few months.
Solution: The surface wasn’t clean enough. Remove the strip. Clean with rubbing alcohol. Let dry. Try stronger adhesive tape. Or switch to a rail system.
Problem: Under cabinet rail isn’t straight.
Solution: Use a level during installation. Mark multiple points before drilling. Check alignment twice. Fix it now or live with it forever.
Problem: LED lights don’t fit the rail channel.
Solution: Rails and lights come in different sizes. Measure your rail channel width. Buy lights that match. Most rails are 8mm, 10mm, or 12mm wide.
Problem: Magnetic strip falls off above the stove.
Solution: Heat weakened the adhesive. Don’t use adhesive mounting above heat sources. Screw in a rail instead. Or move lights to a cooler spot.
Problem: Lights flicker or don’t work.
Solution: This isn’t the mounting system. Check your LED lights connections. Make sure wires are secure. Test the power supply.
Expert Tips I’ve Learned
Tip 1: Clean surfaces twice. Once with dish soap and water. Then with rubbing alcohol. Wait for complete drying. This single step prevents most failures.
Tip 2: Measure from the cabinet front edge. Keep mounting systems one to two inches back. This prevents glare in your eyes. Light hits your countertop at the best angle.
Tip 3: Plan wire paths before mounting anything. Wires running down cabinet sides look messy. Hide wires inside cabinets when possible. Use wire channels or covers.
Tip 4: Buy extra length. It’s easier to cut down than to stretch. LED strip lights and magnetic strips both cut to size. Have 10% extra material.
Tip 5: Wait for adhesive to cure. Don’t add weight immediately. Magnetic strips need 24 hours. Adhesive-mounted rails need 48 hours. Patience prevents failures.
Tip 6: Consider cabinet material. Solid wood cabinets work with anything. Particleboard cabinets are softer. Screws might not hold as well. Laminate can be slippery for adhesive.
Tip 7: Match color to cabinets when possible. This makes systems less visible. White mounting on white cabinets disappears. Black on dark wood looks intentional.
What Real Users Say
I’ve talked to hundreds of homeowners about their choices. Here’s what they tell me.
People who chose magnetic strips love the easy installation. They did it themselves in an afternoon. No stress. No special tools.
But many wish they’d chosen rails. Magnetic strips work fine at first. But adhesive failure frustrates people. Lights fall off at the worst times. Usually while cooking dinner.
People who chose under cabinet rails are happier long-term. The installation was harder. Some hired help. But they never think about their lighting now. It just works.
The biggest regret? Cheaping out on quality. Bad magnetic strips use weak adhesive. Cheap rails come with poor-quality LED lights. Spend a bit more. Get better results.
Success comes from matching the system to your needs. Renters love magnetic strips. Homeowners prefer rails. Both can work perfectly in the right situation.