Last Updated on August 12, 2025 by Kathay Lee
What Angle to Sharpen a Fillet Knife: The Complete 2025 Guide
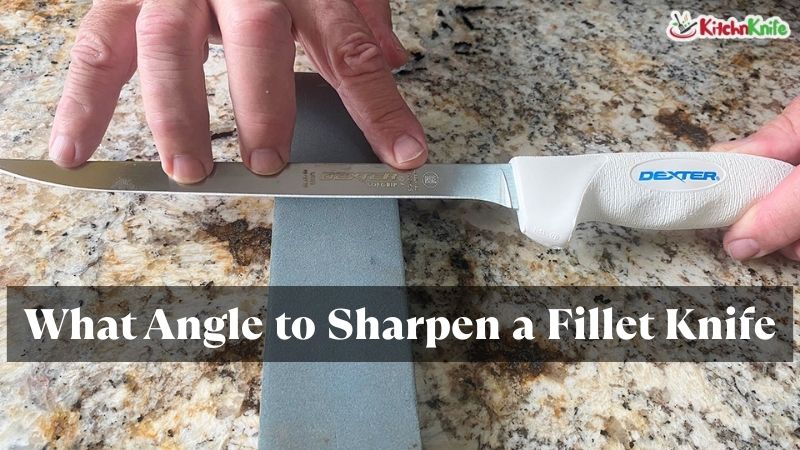
A sharp fillet knife makes all the difference when preparing your catch. The right sharpening angle can turn a frustrating fish cleaning session into smooth, precise work. But many anglers struggle with one key question: what angle should you use?
Most fillet knives work best at 15 to 20 degrees per side. This creates a total edge angle of 30 to 40 degrees. The exact angle depends on your needs, skill level, and the fish you process.
This guide covers everything you need to know. You’ll learn the best angles for different situations. We’ll show you how to sharpen your knife correctly. By the end, you’ll have a razor-sharp edge that glides through fish with ease.
Understanding Fillet Knife Angles
The bevel is the angled surface that forms your knife’s cutting edge. When we talk about sharpening angles, we mean the angle between the blade’s flat side and the bevel.
Here’s how it works:
- Each side of your knife gets sharpened at a specific degree angle
- A 15-degree angle on each side creates a 30-degree total edge
- A 20-degree angle on each side creates a 40-degree total edge
Think of it like a triangle. The sharper the angle, the thinner the edge. A thinner edge cuts better but breaks more easily.
Most kitchen knives use this same principle. A chef knife might use 20 degrees per side. Asian-style knives often use 15 degrees. Fillet knives need similar precision for clean cuts through fish.
The knife bevel angle affects two main things:
- Sharpness – Lower angles cut better
- Durability – Higher angles last longer
You need to balance these factors. A super-sharp 12-degree edge might chip on fish bones. A durable 25-degree edge might tear delicate fish flesh.
The Optimal Fillet Knife Angle
15-Degree Angle: The Precision Choice
A 15-degree angle creates an extremely sharp knife. This works great for:
- Delicate fish like trout or salmon
- Precise cuts around bones
- Thin fillets that need clean separation
- Experienced users who maintain their knives well
The 15° angle produces an exceptionally sharp edge, perfect for precise tasks like filleting fish. You’ll slice through skin and flesh with minimal pressure.
The downside? This degree angle dulls faster. The thin edge can chip if you hit bones hard. You’ll need to sharpen more often.
20-Degree Angle: The Balanced Approach
A 20-degree angle offers the best balance for most users. This degree knife setup provides:
- Good sharpness for clean cuts
- Better durability than 15-degree angles
- Easier maintenance for beginners
- Versatility for different fish sizes
As a general rule of thumb, it is best to remember that a 20-degree angle is good for most knives. This makes it the safe choice for your first fillet knife.
Most kitchen knife manufacturers use 20 degrees as standard. It works well for home users who don’t sharpen daily.
Quick Comparison: 15° vs 20°
| Factor | 15-Degree | 20-Degree |
|---|---|---|
| Sharpness | Excellent | Very Good |
| Durability | Fair | Good |
| Maintenance | High | Medium |
| Best For | Experts | Beginners |
| Fish Types | Delicate | All Types |
Factors That Determine Your Angle Choice
Fish Types and Sizes
Large fish with thick bones need durable edges. Small, delicate fish need precision cuts.
For large fish (salmon, tuna, striped bass):
- Use 20-degree angles for durability
- The edge stays sharp longer when cutting through thick skin
- Less risk of chipping on hard bones
For small fish (trout, perch, crappie):
- 15-degree angles work well
- Precision matters more than durability
- Clean cuts preserve more meat
Steel Quality and Hardness
Your kitchen knife steel affects which angle works best.
High-quality steel (Japanese knives, premium brands):
- Can handle 15-degree angles
- Holds sharp edges longer
- Worth the extra maintenance
Standard steel (most fillet knives):
- Works better at 20 degrees
- More forgiving for beginners
- Easier to sharpen at home
Your Skill Level
Beginners should start with 20-degree angles. Here’s why:
- Easier to maintain consistent angles
- More forgiving if you make mistakes
- Still gives good cutting performance
Experienced users can try 15-degree angles:
- Better performance with proper technique
- Requires steady hands and practice
- Rewarding when done correctly
Frequency of Use
Daily users (fishing guides, commercial processors):
- Can justify 15-degree angles
- Will sharpen regularly anyway
- Maximum performance matters
Weekend anglers:
- Better with 20-degree angles
- Don’t want constant maintenance
- Need reliability over peak sharpness
Tools and Equipment for Angle Sharpening
Sharpening Stones and Whetstones
Sharpening stones are the gold standard for fillet knives. They give you complete control over the angle.
Water stones work best:
- 400-grit for very dull knives
- 1000-grit for regular maintenance
- 4000-grit for polishing
Start coarse and work finer. This removes scratches and creates a smooth edge.
Angle Guides and Jigs
An angle guide helps maintain consistent angles. These clip onto your blade and ride against the stone.
Popular options:
- Lansky system – Good for beginners
- Work Sharp guides – Easy to use
- Accusharp guides – Compact and portable
These tools take the guesswork out. You set the angle once and focus on technique.
Electric Sharpeners
Electric sharpeners with preset angles work for quick touch-ups:
- Chef’s Choice models have fillet settings
- Work Sharp belt sanders work well
- Knife sharpening systems save time
But they remove more metal than stones. Use them sparingly on good knives.
Pocket Knife Edge Angle Systems
Some pocket knife sharpeners work on fillet knives:
- Lansky Turnbox – Simple and effective
- Smith’s system – Affordable option
- Worksharp pocket – Portable choice
The pocket knife edge angle is often 20 degrees. This matches many fillet knife needs.
Step-by-Step Sharpening Process
Setting Up Your Workspace
Start with proper setup:
- Secure your stone – Use a non-slip base
- Good lighting – You need to see what you’re doing
- Steady surface – Kitchen counter or workbench
- Clean knife – Remove any fish residue first
Safety first. Sharp knives deserve careful handling.
Using an Angle Guide
Angle guides make consistent results possible:
- Attach the guide to your blade spine
- Set your desired angle (15 or 20 degrees)
- Test the setup on scrap material first
- Check both sides match exactly
The guide does the angle work. You focus on smooth, even strokes.
Stone Progression
Work through grits systematically:
Start coarse (400-grit):
- Fix major damage
- Establish your bevel angle
- Work until you feel a burr
Move to medium (1000-grit):
- Refine the edge
- Remove coarse scratches
- Keep the same angle
Finish fine (4000-grit):
- Polish the edge
- Remove any remaining burr
- Test sharpness carefully
Each stone builds on the last. Don’t skip steps.
Maintaining Consistent Pressure
Light, steady pressure works best:
- Let the stone do the work
- Keep strokes smooth and even
- Count strokes to match both sides
- Check your progress often
Too much pressure can damage the edge. Too little won’t cut efficiently.
Testing Sharpness Safely
Test your edge without cutting yourself:
- Paper test – Slice paper cleanly
- Tomato test – Cut without crushing
- Fish skin test – Should glide through
A properly sharpened fillet knife slices fish skin like butter. You’ll feel the difference immediately.
Common Mistakes to Avoid
Inconsistent Angles
The biggest mistake is changing angles mid-stroke. This creates:
- Rounded edges instead of sharp ones
- Poor cutting performance
- Faster dulling
Solution: Use an angle guide until muscle memory develops.
Over-Sharpening
Some people think more sharpening equals better results. Wrong.
Over-sharpening causes:
- Excess metal removal
- Shorter knife life
- Damaged edge geometry
Solution: Stop when the knife cuts cleanly. Test performance, not perfection.
Wrong Stone Selection
Using the wrong grit wastes time:
- Too coarse on good edges
- Too fine on damaged blades
- Skipping necessary grits
Solution: Assess your blade first. Choose grits that match the needed work.
Safety Errors
Sharp knives demand respect:
- Never catch a falling knife
- Cut away from your body
- Store blades safely
- Keep first aid handy
Solution: Develop safe habits early. They become automatic with practice.
Maintaining Your Sharp Fillet Knife
Proper Storage
A sharp knife needs protection:
- Knife blocks prevent edge damage
- Magnetic strips keep blades safe
- Blade guards work for tackle boxes
- Sheaths protect during transport
Never throw fillet knives loose in drawers. The edges will chip and dull.
Cleaning After Each Use
Fish fillet work is messy. Clean immediately:
- Rinse with fresh water – Remove salt and scales
- Wash with soap – Get rid of oils and proteins
- Dry completely – Prevent rust and corrosion
- Light oil coating – Protects during storage
Proper cleaning prevents damage. It also keeps your knife food-safe.
When to Re-Sharpen vs. Touch Up
Learn the difference:
Touch-up needed:
- Cuts feel slightly dull
- Paper test still works
- Just lost the fine edge
Full sharpening needed:
- Won’t cut paper cleanly
- Requires pressure to cut
- Visible nicks or damage
Touch-ups use fine stones only. Full sharpening starts with coarser grits.
Signs Your Knife Needs Attention
Watch for these warning signs:
- Tearing instead of cutting fish skin
- Slipping on smooth surfaces like scales
- Requiring extra pressure for basic cuts
- Visible damage to the edge
Address problems early. Small issues are easier to fix than major damage.
Professional vs. DIY Sharpening
When to Seek Professional Help
Sometimes pros are worth the cost:
- Major damage beyond your skill
- Expensive knives you can’t replace
- Complex repairs like chip removal
- Time constraints during fishing season
Good sharpening services understand fillet knives. They know the right angles and techniques.
Cost Comparison
DIY costs:
- Sharpening stones: $50-150 one time
- Angle guides: $20-80 one time
- Your time: 30-60 minutes per session
Professional costs:
- Per knife: $5-15 each time
- Convenience: Drop off and pick up
- Expertise: Guaranteed good results
DIY saves money long-term if you sharpen regularly.
Quality Expectations
Good DIY results:
- Clean, consistent cuts
- Reasonable edge life
- Satisfying to achieve
Professional results:
- Perfect geometry every time
- Maximum edge life
- Repair capabilities you lack
Both approaches work. Choose based on your priorities and budget.
Frequently Asked Questions
What angle should I use for my first time?
Start with 20 degrees per side. This creates a 40-degree total edge angle. It’s forgiving, durable, and still cuts well. Once you master this angle, you can try 15 degrees if you want.
Can I change my knife’s existing angle?
Yes, but it takes work. The angle of the knife refers to the bevel of the blade where the two sharpened edges meet. Changing from 20 to 15 degrees means removing metal to create a new bevel. Start with coarse stones and be patient.
How often should I sharpen my fillet knife?
It depends on use:
- Heavy use (daily): Touch up weekly, full sharpen monthly
- Regular use (weekends): Touch up monthly, full sharpen seasonally
- Light use (occasional): Full sharpen as needed
Watch performance, not calendars. A dull knife is unsafe and frustrating.
What’s the difference between honing and sharpening?
Honing realigns the edge without removing metal. Sharpening removes metal to create a new edge.
- Steel rods hone edges
- Sharpening stones remove metal
- Honing maintains sharpness
- Sharpening restores sharpness
Hone often, sharpen when needed.
Do expensive knives need different angles?
Not necessarily. A fillet knife has a very sharp angle regardless of price. But expensive knives often:
- Handle sharper angles better
- Hold edges longer at any angle
- Sharpen more easily with quality steel
The principles remain the same. Quality knives just perform better at whatever angle you choose.
Conclusion
The best fillet knife angle balances sharpness with durability. For most anglers, 20 degrees per side provides excellent results. Experienced users might prefer 15 degrees for maximum precision.
Remember these key points:
- Start with 20-degree angles as a beginner
- Use an angle guide for consistent results
- Practice on sharpening stones for best control
- Maintain your sharp knife with proper care
Take time to practice your technique. A well-sharpened fillet knife transforms your fishing experience. Clean, precise cuts preserve more meat and make the job enjoyable.
Your knife is an investment in better fishing memories. Keep it sharp, and it will serve you well for years to come.